Friday, December 17, 2010

12 Weeks of Christmas Cookies Finale

This is the final week of the 12 WOCC, and although I don't have a cookie for you, I am linking up so that I can see what everyone else baked!

Thank you so much for baking along this year, it was a ton of fun and so many new recipes to try!

Happy Holidays!!!


Week 12 Twelve Weeks of Christmas:

Wednesday, December 8, 2010

Holidays....

The holidays are here and upon us and I honestly am having a hard time finding the time to even sit and think for a few minutes to myself. With that said I am taking a break until after the first of the year. I know, my fellow cookie bakers, I am bailing on you the last 2 weeks, and I am sorry, but honestly don't see cookie baking in my future until the week of Christmas. The next 2 weekends I am out of town and with holiday parties, kids chorus concerts, high school wrestling...they come first and then baking is second. That is just life for me right now.

I hope that everyone has a Merry Christmas and a Happy New Year!

Friday, December 3, 2010

Thumbprint Cookies-Week 10

One of my favorite cookies...I know, I say that alot, is thumbprint cookies. I am not sure what it is about them that I will choose first off of a goodie tray. I have shown you the Butter Meltaways that were filled with that sweet cream cheese filling, this week I am going with a butter cookie filled with your choice of jam. I have used raspberry, strawberry and apricot and all of them went well together, although my preference would be the tanginess of raspberry.
So here we are at week 10, only 2 more to go. I hope everyone is enjoying the holiday season so far!
Giant's Thumbprint Cookies
from: Gale Gand

8 oz. (2 sticks) unsalted butter, softened
2/3 cup sugar
1/4 vanilla bean, halved lengthwise, soft insides scraped out
1/8 tsp salt
2 cups plus 2 Tbsp all purpose flour
1/4 cup jam of your choice

Heat the oven to 350 degrees. Butter 3 sheep pans or use 1 pan and bake the cookies in 3 batches.

Cream the butter and sugar in a mixer fitted with a paddle attachment (or using a hand mixer) until fluffy. Add the vanilla scrapings and salt and mix until incorporated. Add the flour and mix at low speed until incorporated.

Using your hands, roll the dough into golf ball size balls and arrange them 2 inches apart on the cookie sheet flattening them out a bit as you go. Using your thumb, press the top of each cookie to make a shallow well. Roll your thumb back and forth to widen the well. Using a small spoon, fill the wells with jam.

Bake until very lightly browned around the edges, 25 to 30 minutes. Let cool slightly on the pan, then transfer to a rack to finish cooling. Store in an air tight container.


Week 10 Twelve Weeks of Christmas:

Monday, November 29, 2010

Hot Cocoa Bread-Week 9

I know, I am late. I am sorry. With the Holiday and family gatherings..time just got away from me. I hope you all had a fantastic Thanksgiving! I did, and I am sure I added a few pounds around the waistline as well.


This week I decided to do a quick bread. A few weeks ago I was contacted by Allison from Lake Champlain Chocolates asking if I would be interested in sampling some of their cocoa. It is organic and Fair Trade and would be perfect for any baking that I would be doing. Of course, I would love to try it!! And since this bread only uses cocoa, it would be perfect and I was not disappointed! I will be making this bread in mini loaf form, and will add a chocolate ganache to the top and add some mini marshmallows. My boys loved this so much that they finished the loaf in a day, and it was a big loaf! The recipe warned that it would make a big loaf to use the biggest loaf pan, I used the biggest one I had, and should have split it into 2 loaves. It overflowed from the top and took a little longer to bake.


This week is the first of December which means that we only have 3 more weeks of cookies left! And I need to tell my fellow cookie bakers, that I have not been ignoring your posts. My work place has decided to put a new firewall on our computers..which enables me to comment. I can look all day, but it blocks me to leave a comment. Once I get home for the day, the mommy in me takes over and I don't get alot of time to be online to comment. I mean, what do they expect me to do here?? work?? :)


Now, I have a surprise for you...keep reading on down and you'll see!

Hot Cocoa Bread:

from: Chickens in the Road

1/2 cup cream cheese, softened
1/4 cup butter, softened
1 1/2 cups sugar
1 egg
1 teaspoon vanilla
1 1/4 cups cocoa powder
1 1/4 cups buttermilk
2 1/4 cups all-purpose flour
1 1/2 teaspoon baking soda
1/2 teaspoon salt
3/4 cup mini marshmallows

Combine cream cheese, butter, and sugar. Cream with a mixer. Add egg and vanilla. Mix again. Add the cocoa powder and about 1/2 cup of the buttermilk; mix well. Add all the remaining ingredients (except the marshmallows) and stir to combine. Stir in the marshmallows.


Spoon into a greased loaf pan. This makes a large loaf–use your largest loaf pan.
Bake at 350-degrees for one hour.


Storey Publications sent me a copy of this book, A World of Cake to review. It is beautiful! I have to admit, I love a book with pictures...probably, if you don't have pics in the book...I am going to pass it up. The book gives you a world tour in cake form...have you ever wondered how they make the moon cakes that you see on blogland?? The recipe is in the book...funnel cakes?? it's there...name the cake, it is in there! You want a copy??? Just leave me a comment on this post. Tweet it, Facebook it...blog about it, come back and leave me another comment for more chances.

I will draw the winner and announce on This Friday's, December 3rd, cookie post.

Friday, November 19, 2010

Chewy Chocolate Cookies-Week 8

I have to be honest, there has been nothing baking in my kitchen this week. So, I thought we could take a trip down memory lane. I made these last year and they quickly became one of my favorites. If you need a recipe that will make alot of cookies...say 6 dozen...this one is for you!
Want the recipe? Go here.
Happy Baking! Make sure to check out the other cookie bakers!


Week 8 Twelve Weeks of Christmas:

Friday, November 12, 2010

Butter Meltaways--Week 7

Can you believe that we are over half way mark? Week 7 and we have 5 more weeks to go. I make these every year for Christmas, these are the ones that will always be on my goodie trays. They are simple and quick and delicious!

Butter Meltaways with Cream Cheese Frosting
By: Paula Deen

1 1/4 cup all purpose flour
1 cup butter, softened
3/4 cup cornstarch
1/3 cup confectioners sugar

In a large bowl, combine all ingredients. Beat with an electric mixer at medium speed until fluffy.

Separate dough into 4 equal parts and roll each into a smooth log. Wrap each log in flour dusted wax paper. Chill dough for at least 6 hours. After six hours, allow dough to sit out for 15 minutes to soften.

Preheat oven to 350 degrees. Grease baking sheets.

Slice dough into 1/4 inch thick slices and place on prepared baking sheets. Bake 10 minutes. Cool completely on wire racks.

Frosting:
1 cup confectioner sugar
1 (3 oz.) cream cheese, softened
1/2 tsp vanilla
1/2 to 1 drop food coloring

In a medium bowl, combine all frosting ingredients. Beat with an electric mixer until creamy. Pipe or dollop a small amount on top of cooled cookies.

***Here are my notes on this recipe. This recipe calls to make 8 dozen cookies. That is why you roll it into logs. I did not do this. I also did not chill my dough. Once it was mixed, I rolled it into 1 inch balls with floured hands and it worked fine. When I roll it out and cut into shapes, then I chill it, but not for 6 hours. Only until it is firm enough to roll.***

Week 7 Twelve Weeks of Christmas:

Friday, November 5, 2010

Cranberry Dark Chocolate Chunk Oatmeal Bars-Week 6

Oh my people, we are at week 6 of the 12 Weeks of Christmas cookies! I thought all week that this is week 5, it has been that kind of week. These weeks just keep going by quicker and quicker! I don't know about you, but I am excited to see all the Christmas decorations going up in the stores and I have noticed the holiday commercials starting to show up. :)


This week I needed something comforting and easy. I went back to the Oatmeal Raisin cookies I made for Week 2, subbed the raisins for dried cranberries and added some dark chocolate. I think I like cookie form better than the bar form, but the hubby loved them, even though he doesn't like cranberries.


Oatmeal Raisin Cookie Bars

Adapted from: Quaker Oats

1/2 cup (1 stick) plus 6 tablespoons butter, softened

3/4 cup firmly packed brown sugar

1/2 cup granulated sugar

2 eggs

1 teaspoon vanilla

1-1/2 cups all-purpose flour

1 teaspoon baking soda

1 teaspoon ground cinnamon

1/2 teaspoon salt

3 cups oats

1 cup dried cranberries

1 cup dark chocolate chunks


Heat oven to 350°F.

In large bowl, beat butter and sugars on medium speed of electric mixer until creamy. Add eggs and vanilla; beat well. Add combined flour, baking soda, cinnamon and salt; mix well. Add oats, cranberries and chocolate; mix well.

Drop dough by rounded tablespoonfuls onto ungreased cookie sheets.

Bake 7 to 9 minutes or until light golden brown. Cool 1 minute on cookie sheets; remove to wire rack. Cool completely. Store tightly covered.

Friday, October 29, 2010

Potato Candy-Week 5


One of things that I remember my mom making every Christmas is this potato candy. She learned from her granny, who is someone I wished I could have known. I hear I am just like she was. Before now, I never could get this candy to turn out. It is strange to me how when you add powdered sugar to a boiled potato, it liquefies...resulting in adding more sugar until it becomes a ball of dough. So before now, I would cheat. I would take a can of vanilla frosting and a 1 lb box of powdered sugar mix it all together until a ball would form. Hey, it worked for me and my mother would always say "your granny would not be proud", in my defense, I never met the woman so how would I know? She should have left me some sort of book. :)


Week 5 of the 12 Weeks of Christmas Cookies is here and that leaves 7 more weeks of some yummy things! I can now say that my Great Granny would be proud of me for making this the way she would. I now don't have to buy the canned stuff, because I now have the potato candy making as a success!


I think I should go ahead and tell you that I don't have an exact recipe, I'll just kind of explain how I did it. :)


Potato Candy


1 small potato, peeled, quartered and boiled until done


2lb bag of powdered sugar


Peanut Butter


Put the cooled potato in a medium bowl (I used my mixer with the paddle attachment) slowly add the powdered sugar, the potato will become liquefied, keep adding the powdered sugar until it forms a ball. You won't use the whole bag of powdered sugar, but you may need a little more or less than the 1 lb box. Once you have a ball, lightly dust your workspace with the powdered sugar and roll out the dough to the thickness that you like. Spread with peanut butter, and again, this is to your liking add as much or as little, just make sure that if you add more that your seam is sealed so it doesn't leak out when rolled up. Roll you dough pinwheel style and once rolled slice into slices.

Week 5 Twelve Weeks of Christmas:


Tuesday, October 26, 2010

Maggot Pudding with cockroaches for The #GreatHallowTweet Bloghop

Day 2 of The #GreatHallowTweet Bloghop and I give you maggot pudding with cockroaches. Sounds delicious, huh? Don't be afraid...it really is tasty!

Make sure to visit the links on the sidebar for more Halloweenie treats!!

Maggot pudding with cockroaches

1 3/4 cup water
1/2 cup rice
1/8 tsp salt
1/2 cup fat free milk
3 Tbsp honey
1/4 cup cranberries, or more for your tasting

Put the water in a medium saucepan and heat on medium heat until boiling. Add rice and salt and cook until water is absorbed, about 30-45 minutes. Add the milk, honey and cranberries and cook for 10 more minutes until thickened and creamy. Serve warm or chilled.

Monday, October 25, 2010

Orange Chocolate Dirt Balls-The #GreatHallowTweet Bloghop

It is day 1 of the #GreatHallowTweet Bloghop hosted by Renee from Flamingo Musings, and it is sure to be a ton of fun and give lots and lots of those Halloween treats that we love...either it be simple and sweet...or gross, either way..check out the linky on the sidebar and see what 17 other bloggers are coming up with.

For today, I chose to go a little short and sweet but something that just says Halloween when you look at them. Orange chocolate dirt balls, or oreo bon bons. When I think of Halloween, sweet comes to mind...chocolate, candy bars...the sticky gummy candies..cookies. So what better way for me to kick off this week than these little balls. You have the darkness, the blackness...from the oreo cookies and then the hard shell of the orange chocolate...the perfect colors for the day right?

Dirt Balls

1 package of oreo cookies
1 8 oz. cream cheese, room temperature

1 package of white chocolate melts, I used Wilton Candy Melts

Put all the Oreo cookies in a food processor and process until all cookies are finely crushed. Put into a medium bowl and mix with the cream cheese. Roll into balls and put onto a cookie sheet lined with waxed paper.

Melt the candy melts in a double boiler and dip the oreo balls until completely covered. Place back on the waxed paper and let sit until the chocolate is set..or if you are like me and not that patient..put into the freezer for a minute or two.

Friday, October 22, 2010

Candied Ginger Butter Cookies-Week 4

A few week ago Beth sent me a package of candied ginger. I wasn't sure what I would do with it so I thought I might just munch on it...have you ever tried it?? Boy, does it have a bite to it! I don't think that will become my snack of choice. So, while flipping through some old magazines, I came across this cookie and knew that it would be perfect to use the ginger and this weeks cookie.

Yes, we are at week 4 of cookies and I am still just as excited each week as the first to see what everyone comes up with. This cookie was not at all what I expected, but you know what? I love it! It is kind of like a spiced up shortbread, but soft and chewy in the middle. And you know, I really like the bits of the ginger in them. I will be making them again and think I will add a little more of the chopped candied ginger.

Candied Ginger Butter Cookies

1 cup butter, softened
1/3 cup sugar
1/3 cup brown sugar
2 tsp vanilla
1 tsp ground ginger
1/2 tsp cinnamon
1/4 tsp salt
2 cups all purpose flour
2 Tbsp crystallized ginger, finely chopped


2 oz bittersweet chocolate, finely chopped
1/2 tsp shortening


Preheat oven to 325 degrees. Line a cookie sheet with parchment paper; set aside. In a large bowl, beat butter with an electric mixer on medium to high speed for 30 seconds. Add sugar, brown sugar, and vanilla. Beat until combined, scraping bowl occasionally. Beat in the ground ginger, the cinnamon, and salt until combined. Using a wooden spoon, gradually stir in flour and the crystallized ginger.


Divide dough in half. On the prepared cookie sheet, press one portion of dough into a 10x2 1/2 inch rectangle. Bake for 22 to 24 minutes or until top is golden brown and edges are set. Cool on cookie sheet for 10 minutes. Cut rectangle crosswise into 1/2 inch wide sticks. Transfer cookies to a wire rack; let cool. Repeat with the remaining dough.


Melt the chocolate and shortening in a small bowl in the microwave until smooth. Drizzle over cooled cookies and let stand until the chocolate sets.

Week 4 Twelve Weeks of Christmas:

Tuesday, October 19, 2010

Peach Crumb Pie Bites


With it finally feeling like fall here, this week anyways, we did have a few days last week with temps back near 90. I wanted to have one last taste of Summer and these hit the spot. With them being two bite size, just grab and go, only I grabbed and went several times! Although I went with peach filling, you can always change up the fruit filling..apple, cherry, pear..whatever your tastebuds are calling for!

There are a couple of things I will tell you about the recipes. The dough recipe makes 24 mini pies. The filling recipe makes about double of what you need..so make it and freeze half, or double your dough and make more of these babies...I am sure you won't get any complaints. :) And the crumb topping makes double of what you will need too, so you may want to half that recipe.

Peach Crumb Pie Bites

Dough:
1/2 cup butter, softened
3 oz cream cheese, softened
1/4 cup powder sugar
1 cup flour

Filling:
4 large peaches, peeled, pitted, and finely chopped
1/2 cup firmly packed brown sugar
2 tbsp butter, melted
1 tsp vanilla extract
1/8 tsp ground cinnamon
1/8 tsp salt
1/8 tsp ground nutmeg

Crumb topping
1/2 cup flour
1/4 sugar
2 Tbs. brown sugar
1/4 tsp. cinnamon
1/4 tsp salt
1/4 cup butter, room temperature

Crust:
Beat the butter and cream cheese until smooth. Add the powdered sugar and beat until well incorporated. Add the flour and mix scraping down the sides until just combined. The dough should be soft and slightly sticky. Scoop and roll into small 1 inch balls and place in the cups of an ungreased mini-muffin tin. Press in the bottom and up the sides of the cups in the muffin tins. Set aside the shells. Preheat the oven to 350 degrees.

Filling:
Put the peaches, brown sugar, butter, vanilla, cinnamon, salt and nutmeg in a medium saucepan over medium heat. Cook until peaches are tender, about 30 minutes. Set aside.

Crumb topping: Mix the flour, sugars, cinnamon and salt together in a bowl with a fork. Cut the butter in using two butter knives until it resembles small peas.

Place a small scoop of the peach filling into each mini shell, filling to the top. Sprinkle on a good amount of the crumb topping pressing slightly to adhere. Place in the oven and bake for 20-25 minutes or until the top is slightly browned and the shells are a golden brown. Remove from the oven and let them cool in the pan for 3 minutes. remove them from the pan and let them cool on a cooling rack.

Friday, October 15, 2010

Whoopie Pies-Week 3


This week I chose to go with whoopie pies. It is my son, Blake's, birthday so these were perfect for today. There are so many ways you can make them. I have made them before a while back, but wanted to go with a "cake" flavor this time around. You can definitely make these festive using Christmas sprinkles or color the batter. The filling possibilities are endless as well.

So, here we are at week 3, leaving 9 more to go!! There are over 50 cookie bakers, so that is alot of cookies each week! I don't think that any of us will have any trouble making our trays for this year!


Birthday Cake Whoopie Pies

For the cookies:

8 tbsp. unsalted butter, at room temperature
¾ cup sugar
2 tsp. vanilla extract
2 large eggs
2¼ cups all-purpose flour
1½ tsp. baking powder
¾ tsp. salt
½ cup milk


Preheat the oven to 375˚ F. Line two baking sheets with parchment paper or silicone baking mats. Combine the butter and sugar in the bowl of an electric mixer and beat on medium-high speed until light and fluffy, about 2 minutes. Blend in the eggs one at a time, beating well after each addition. Blend in the vanilla. In a medium bowl combine the flour, baking powder, and salt; whisk to combine. With the mixer on low speed, add the dry ingredients to the bowl, alternating with with the milk, and beating each addition just until incorporated.

Using a cookie scoop, scoop your batter and place an inch or two apart. Bake 8-10 minutes, until the cookies are set (they should not brown.) Transfer to a wire rack to cool completely. Repeat with any remaining batter as necessary.

Buttercream:
1 sticks of butter, room temperature
1 tsp vanilla extract
4 cups powdered sugar
2 Tbsp milk

Cream the butter and vanilla together, gradually add the powdered sugar and milk until you get the consistency you want. Add more as needed.

Chocolate Buttercream: Use the above recipe and add 4 heaping Tbsp.

Week 3 Twelve Weeks of Christmas:


Friday, October 8, 2010

Oatmeal Raisin Cookies-Week 2

Here we are at week 2, and that leaves 10 to go...10 week until Christmas!! I have a confession..until now, I have never made an oatmeal raisin cookie. I have been married 16 years and these are the hubby's all time, hands down favorite, and I have never made them! I have not been a very good wifey. :) I guess the reason for that is because I never really like them. I think it's funny how your likings change. I eat things now that I would have never touched maybe 10 years ago. It's a funny thing. :)

Although, I love a good goodie tray with all kinds of fancy things, I also think that sometimes simple is best. I think that every tray should have a simple chocolate chip cookie and now I think they need a simple oatmeal raisin cookie. These cookies are soft and chewy..sweet with a hint of cinnamon and they are just as good the next day.

Oatmeal Raisin Cookies
From: Quaker Oats

1/2 cup (1 stick) plus 6 tablespoons butter, softened
3/4 cup firmly packed brown sugar
1/2 cup granulated sugar
2 eggs
1 teaspoon vanilla
1-1/2 cups all-purpose flour
1 teaspoon baking soda
1 teaspoon ground cinnamon
1/2 teaspoon salt
3 cups oats
1 cup raisins

Heat oven to 350°F.

In large bowl, beat butter and sugars on medium speed of electric mixer until creamy. Add eggs and vanilla; beat well. Add combined flour, baking soda, cinnamon and salt; mix well. Add oats and raisins; mix well.

Drop dough by rounded tablespoonfuls onto ungreased cookie sheets. Bake 7 to 9 minutes or until light golden brown. Cool 1 minute on cookie sheets; remove to wire rack. Cool completely. Store tightly covered.
Week 2 Twelve Weeks of Christmas:   

Monday, October 4, 2010

Chocolate Bundt Cake and Peanut Butter Glaze


I needed something fairly quick and simple to make for our game day party on Saturday. Cake seems to go well for both the adults and kids and what better combo than peanut butter and chocolate? This seems to be my go to chocolate cake recipe when I want to make a bundt cake. It is from Askinosie Chocolate and is fabulous! I am out of their cocoa (I guess I should order some!), so I used what I had in the cabinet and it worked out fine. The PB glaze is something I just kind of winged, so we'll just have to go with it. :)


Askinosie Chocolate Cake
2 cups sugar
2 cups flour
1 stick of butter
1/2 cup vegetable oil
4 Tbsp (heaping)Askinosie cocoa powder
1 cup water
1/2 cup buttermilk
1 tsp vanilla
1/2 tsp salt
1 tsp baking soda
2 eggs

Preheat oven to 350 degrees. Grease and flour 9x13 pan. (I used a bundt pan)
Mix sugar and flour together in a large mixing bowl, set aside. Melt butter in a small pan on the stove. Add vegetable oil, cocoa and water. Bring to a boil. Pour cocoa mixture into sugar/flour mixture. Mix for 5 minutes. Add buttermilk, vanilla, salt, baking soda and eggs and mix again until thoroughly combined. Pour into baking pan, bake for 30-35 minutes. Let cake cool completely before serving.


Peanut Butter Glaze
Basically, here is what I did...heated about 1/2 cup milk and mixed in 1/4 cup of creamy peanut butter until smooth. I dumped some powdered sugar in the mixer bowl...probably around 2 cups?? and then I just added the pb/milk mixture until it came to the consistency I wanted. Simple enough, huh? :)

Friday, October 1, 2010

Week 1--Cheesecake Cookies

I know it seem crazy to be talking about Christmas already, but I believe that you can never have too many cookies around the holidays. You may remember last year there was only a handful of us that baked, but I am so excited that this year we have close to 30 of us baking along...I can hardly stand myself thinking of all the cookies that will be made!


We are a family of cheesecake lovers, what better way to start off the first week with a cheesecake cookie? No better time than the present I say. I liked these cookies and will probably make these for my goodie trays this year. The texture reminded me of shortbread with a little tanginess (is that a word?!) from the cream cheese that is added. You could also roll these in any type of coating you want, I chose to go basic with graham cracker crumbs. You could also put some chocolate in the middle..I may go with a rolo candy in the middle the next time. The possibilities are endless on topping/filling combinations. Happy Cookie Baking!!!


Cheesecake Cookies


3/4 cup unsalted butter, softened
3 ounces cream cheese
2/3 cup sugar
1 tsp vanilla extract
2 cups All-Purpose Flour
Graham Cracker Crumbs, for coating


Preheat oven to 375 degrees.


In a large bowl, beat together butter, cream cheese, and sugar. Mix in vanilla extract. Stir in the flour until well combined.


Scoop the dough and form into 1" balls. Roll in graham cracker crumbs so cookie is covered.


Place covered cookie balls onto the prepared baking sheet. Bake for 12 to 15 minutes, or until the edges are golden and the tops are slightly puffed.


Week 1 Twelve Weeks of Christmast:

Wednesday, September 29, 2010

Pineapple Upside Down cupcakes

Some people like, some people don't..I happen to love pineapple upside down cake. This was one of our desserts over the weekend, and it was so nice that you could just pick one up and go instead of having to cut a piece of it from a cake. I did have one little issue, I think I put too much of the brown sugar mixture in the bottom because it ended up coming out of the tops of the muffin pan and down in my oven causing my kitchen to look like we were in a fog..but it didn't effect the taste of these. They still had that sweet topping that we all love!

Pineapple Upside Down Cupcakes

Topping:
1/3 cup brown sugar, packed
1/3 cup unsalted butter, melted
12 pineapple rings, I used pineapple chunks
12 maraschino cherries

Cake:
1 cup all purpose flour
3/4 cup sugar
1/2 tsp baking powder
1/4 cup unsalted butter, room temperature
1/2 cup pineapple, juice, reserved from can
1/2 tsp vanilla extract
1 egg

Preheat oven to 350 degrees. Spray a 12 cup muffin pan with baking spray or grease with butter. Drain the pineapple, reserving the juice for the cake batter. Combine brown sugar and melted butter in a small bowl. Evenly divide among each of the muffin cups, about one teaspoon per cup. Cut about 1/3 out of each pineapple ring and arrange over the brown sugar mixture...this is where I just placed the pineapple chunks in a circle. :) Add a cherry in the center of each ring.

In a mixing bowl, combine flour, sugar and baking powder. Add butter, pineapple juice and vanilla and beat on low until just combined. Increase speed to medium and beat two minutes. Add the egg and beat in until well incorporated. Evenly divide the batter among the muffin cups, filling each about 3/4 of the way full. Bake approximately 25-30 minutes until a toothpick inserted in the center comes out clean. Cool the cupcakes five minutes in the pan and then flip onto ta platter or covered rack.

Thursday, September 23, 2010

Pepperoni Pizza Bites

Normally I would only post something sweet, but I thought these deserved a posting. :) As I said before, we had a "glutton buffet" over the weekend and these were one of the finger foods that I made. I saw these on Megan's Cookin' and knew that I would make them at some point. We are always making some sort of finger food, whether it be for a football game or over the holidays. These were perfect little bites....popular with the 10 kids that were at my house and the adults munched on them too. I did make a couple of little changes, I doubled the recipe to make 4 dozen mini's and added some pizza seasoning to the mix. Not a fan of pepperoni? The combinations are endless in these. Serve with a side of marinara sauce and enjoy!

Pepperoni Pizza Bites
adapted from: Megan

1 1/2 cup flour
1 1/2 teaspoon baking powder
1 1/2 cup whole milk
2 eggs, lightly beaten
2 cups colby jack cheese, shredded
2 cups pepperoni, chopped
1 1/2 tsp pizza seasoning

Preheat oven to 375 degrees.

Grease a mini muffin tin.

In a large bowl, whisk together the flour, baking powder and pizza seasoning; stir in the milk and egg.

Stir in the cheese and pepperoni; let stand for 10 minutes.

Stir the batter and divide among the mini-muffin cups.

Bake until puffed and golden, about 25 minutes.

Tuesday, September 21, 2010

Chewy Sugar Cookies

While I was on my blogging break, it was like the baking bug just bit my right leg off..truth is, I stress bake. Being in my kitchen is therapy, I think I have admitted that before, and I just couldn't stop. Luckily, I did take pics and hopefully will get those posts up. I found these cookies over on My Baking Addiction, Chewy Lemon Sugar Cookies. I love lemon, anything lemon and will probably pick a lemony dessert over a chocolate one, so I knew that I had to try these. This cookie is kind of bittersweet for me...disappointed that the lemon really didn't come out in these..and that is probably mostly my fault. I didn't add the lemon zest. But, the batter was wonderful..lemony, sweet..just want I needed in a cookie. BUT...after baked..you couldn't taste the lemon at all. Bummer. But, I do have to tell you that this was probably the best chewy sugar cookie I have had. I normally won't ever choose a sugar cookie because they always seen crumbly and dry to me. Not these, they were delish and the kids and hubby gobbled them up.

Chewy Sugar Cookies
adapted from My Baking Addiction

2 3/4 cups all-purpose flour
1 teaspoon baking soda
1/2 teaspoon baking powder
1/2 teaspoon salt
1 cup butter, softened
1 1/2 cups white sugar
1 egg
1/2 teaspoon vanilla extract
1/2 cup sugar for rolling cookies

Preheat oven to 350 degrees. Line cookie sheets with parchment paper.

In a small bowl, stir together flour, baking soda, baking powder and salt. Set aside.

Using a mixer, beat together the butter and sugar until smooth and very fluffy. Beat in egg, vanilla extract, lemon juice and lemon zest. Gradually blend in the dry ingredients. Roll rounded teaspoonfuls of dough into balls, and roll in sugar.

Place on lined cookie sheets about 1 1/2 inches apart. Bake 8 to 10 minutes in the preheated oven, or until lightly browned. Let stand on cookie sheet two minutes before removing to cool on wire racks.

Makes approximately 24-30 cookies depending on size

Friday, September 17, 2010

2 weeks and counting.....

We are now on the count down for the first week of the 12 weeks of Christmas cookies bake along. Here is who I have so far that is going to be cookie baker for the next 12 weeks.

Barbara from Barbara Bakes
Megan from Megan's Cookin
Megan from My Baking Adventures
Jamie from Mom's Cooking Club
Tracy from SugarCrafter
Beth from You Know What you Oughta Do
Heidi from With Thankful Hearts
Stephanie from Dispensing Happiness
Katy from Alphabet Soup
Tania from Love Big, Bake Often
Avril from Baking and Creating with Avril
Tracy from Mid-Western Girl with a Texas Address
Randi from Little Food, Lot of Flavor
Lina from Crustabakes
Stephanie from Bite by Bite
Lisa from Sweet as Sugar Cookies
Chaya from Chaya Comfy Cooks
Bree from Baked Bree
Megan from Less Than Adventurous
Pam from From Apples to Zucchini
Melynda from Melynda's Muffins..errr..Food Madness
Dajana from Baker's Corner...Somewhere in my Kitchen
Jennifer from Maple n' Cornbread
Chip from Cooking with Chip
Trisha from My Hobbie Lobbie
Katrina from Baking and Boys
Renee from Flamingo Musings
Krista from Meet the Swan's
Amanda from Fake Ginger
Wende from The Rickett Chronicles
Joy from Joy's Misadventures
Mary from Bites and Bliss
Diana from The Iron Maiden
Maggie from Ceo A's Draiocht
Cara from The Boys Made Me Do It
Erin from Making Memories
Rachael from Rachael Raves
Hannah from City Baked
Sue from Munchkin Munchies
Katie from Level 2 Mommy
Samantha from Bikini Birthday
Bonnie from City Home Country Home
Beth from A Nutmeg Kitchen
Louann from Louanne's Kitchen
Marcellina from Marcellina in Cucina
Lee Ann from C'est si bon Sweets and Treats
Alexandra from Peace Love Sprinkles
Martha from Seaside Simplicity
Mickey from Monster Mama
Rachel from Rachel's Bite
Tamy from 3 Sides of Crazy
Manoela from Dessert First

If I left you off, please, please, please forgive me!!! Also, if you haven't received an email from me, let me know. I have a couple of pieces of info to pass along! I am super excited! :) Start looking through those cookie recipes girls, I have cookie trays to start planning!

As I mentioned before the hubby told me I needed to start blogging again. It is so true. Isn't it funny how blogging becomes a part of you? I love blogging, love the friends that I have made and the ones that I haven't yet and I miss it. But, I also realize that you have life to live. Life just happens. I have to find that balance.

So, today is my anniversary. I have been married 16 years today! Wow, the time flies. Tomorrow TN plays FL and honestly, we are going to lose. And if I am being honest...I don't really like to watch football on TV..I just like to get together with great friends and eat. This weekend is not different, I have officially named it "Glutton Buffet Day" because yes, my friends, we have that much food planned and I will probably gain 10 pounds. So, I should have something new to blog about next week. :) Have a great weekend!

Monday, September 13, 2010

Just curious.......

What does it mean when your hubby tells you that you really need to start blogging again?? That is makes you happier???

I'm thinking he just misses the goodies!

Tuesday, September 7, 2010

Hey there!


Did you think that you could get rid of me that easy? Just kidding. I got an email from Barbara, who got an email from Jamie, asking if we would be cookie baking again this year. Remember our 12 weeks of Christmas cookies? I know...it is crazy to even be thinking of this with temps still in the 90's...but...it is that time to start thinking.

Put on your cookie thinking hats and bake along with us this year. The first post will be on Friday October 1st and each Friday after that with our last being on December 17th. Yep..that is 12 weeks.

I need to add a couple of details. You get to choose whatever you want to make for that week. I know that I have a ton of recipes bookmarked, printed, ripped out of magazines. This is the time to try them out. Also, if you want to make a bar, or even a candy for that matter..if it is something you put on your goodie trays, we want to know about them. :)

Will you be cookie crazy with us? You know you want to....oh, and I need some new cookies for my trays this year. :) I hope you will! If so, comment here or shoot me an email, I would love an email. :)

Monday, August 30, 2010

Let's chat.....

I think it has come to the time that have to admit that I need a break from this little blog. I have put it off and put it off, but since it has been a month since I have posted last, it is time. There are some things going on my my little life that require my time and attention and I don't see it lightening up any time soon.

When I started blogging I never expected that I would make so many friends. Blogging friends are the best! :)

So, I will leave it as this.....I will still be around reading the updates from you and at some point I hope to be back.

Happy Baking!!

Thursday, July 29, 2010

Blackberry Pie Bars


Blackberries are in season here right now, and since I have a great hubby that works outdoors...he finds the best blackberry patches that are just there for the picking. There is just something calming to me about berry picking or any kind of picking for that matter. I could pick for hours and I did just that with these berries. It makes me happy! :)

We had a cookout with our church this past Sunday and had so much fun! I made these to take. I don't know..but when we have a get together and I need to take something, bars always come to mind. They are easy to just pick up and go.

These bars have a sweet crust with a moist, gooey filling and then the crunch on top. I will make them again and probably try different berries in them or maybe peaches!

Blackberry Pie Bars

For the dough:
1 1/2 cups All Purpose Flour
3/4 cup sugar
3/4 cup cold butter, cut into cubes
Zest of one lemon
Pinch of salt

1. Rub zest of lemon into sugar using the back of the spoon creating a lemon scented sugar.

2. In the bowl of your mixer, dump in flour, sugar/lemon zest mixture, butter and salt. Beat with the paddle attachment for a couple of minutes until the dough comes together in small chunks.

3. Press half of the dough into the bottom of a greased 9 x 13 pan. Set aside the remaining dough.
4. Bake the dough for 10 minutes in a preheated 350 degree oven. Let cool for 10 minutes.

For the filling:
2 large eggs1 cup sugar
1/2 cup sour cream
1/2 cup all purpose flour
3 cups blackberries (if using frozen, thaw and drain first)

1. Whisk the eggs in a large bowl. Add sugar, sour cream and flour to the eggs. Mix well and then fold blackberries.

2. Pour blackberries over baked crust and spread evenly.

3. Sprinkle the reserved dough on top of the blackberry mixture and bake for 50-60 minutes.

4. Let cool one hour before serving.

Saturday, July 24, 2010

Chocolate Butter Cupcakes with Vanilla Bean Buttercream

For the past couple of days I have been craving a chocolate butter cake with vanilla bean butter cream frosting. Why? I have no earthly idea..but I am so glad that I finally caved. These cupcakes turned out just what I wanted...moist, buttery,chocolaty, light...I could go on and on. The recipe also made a ton! I ended up baking 2 dozen regular sized cupcakes and 3 dozen mini's..you know, I had to make sure that there would be enough to go around! :)

The butter cream is just a simple butter cream, and I used vanilla bean paste to get the vanilla bean flavor and the little specks in the frosting. Those little specks make me happy! I like it because you don't have to scrape the actual vanilla bean, and it is cheaper and goes a little further.

The weather here has been just plain hot! For the past 2 days the heat index has been at least 105. That is just way too hot! So, these little babies are helping me beat the heat. I mean, what can be better? Sitting in the AC, eating cupcakes? I can't think of anything better...other than maybe sitting by the ocean eating a cupcake. :)


Chocolate Butter Cupcakes:

4 oz unsweetened chocolate, chopped
1/3 cup unsweetened cocoa powder
1 cup boiling water
2 1/4 cups all purpose flour
2 tsp baking powder
1 tsp baking soda
1/4 tsp salt
1 cup unsalted butter, room temp
2 cup sugar
3 large eggs
2 tsp vanilla
1 cup milk

Preheat oven to 350 degrees. Line cupcake tins with liners.

In a heatproof bowl place the chopped unsweetened chocolate and cocoa powder. Pour the boiling water over the chocolate and cocoa powder and stir until they have melted. Set aside to cool while you make the batter.

In a separate bowl, whisk to combine the flour, baking powder, baking soda and salt.

In the bowl of your electric mixer or with a hand mixer, beat the butter until smooth and creamy. Gradually add the sugar and continue beating until the mixture is fluffy. Add the eggs, one at a time, mixing well after each addition. Scrape down the sides of the bowl as needed. Add the vanilla and melted chocolate mixture and beat to combine.

Add the milk and flour mixtures in three additions, beginning and ending with the flour mixture. Beat only until the ingredients are incorporated.

Divide the batter evenly into lined muffin tins. Bake the regular sized cupcakes for 12 minutes and the mini's 8-10 minutes.

Vanilla Bean Butter cream:

1 stick unsalted butter, room temp
1 Tbsp vanilla bean paste or one vanilla bean scraped
2 lb bag of powdered sugar
milk

Cream the butter and add the vanilla bean paste and mix until combined. Gradually add the powdered sugar and add milk as you go along to get the consistency you want.

Friday, July 23, 2010

An idea of sort......

As some of you already know, I have a huge addiction to food magazines. I can't help it, but I figure there are worse things that I could be addicted too. While I was looking through them, I had a thought and thought that I would just throw it out here and see if anyone is interested.

I am wondering if you (anyone) would be interested in doing a food magazine swap. I don't know..every month or so, we would swap 2 or 3 magazines with a partner. The only thing that you would be responsible for would be the postage. What do you think? Something you might want to do? Let me know!

Monday, July 19, 2010

So....since I haven't really been baking anything, I thought I would just pop in here and give a little update on the garden. This is my first garden and I am super excited with the produce that I have gotten from it and what I am still getting. The picture above is what I harvested today. I planted cucumbers, spinach, squash, zucchini, green beans, okra, brussel sprouts and tomatoes. The spinach didn't make it and the squash and zucchini are about done too. The okra is just now starting...and I really don't know what to expect with the brussel sprouts. I have never seen them grown, so it is a watch and see kind of thing.

I have enjoyed everything in my garden..from tilling the ground to planting the seeds. Watching them sprout and now getting to harvest. My kids have enjoyed it and it makes me happy to see that they are eating from our back yard. It is such a good feeling to know that we grew it and there was nothing harmful added to it. If you have ever watched Food Inc., then you know what I am talking about.

I am already planning next years garden and planning to expand it. I would highly suggest to anyone to is questioning the idea of a garden...do it! The benefits from it....well, it just makes you smile!

I hope everyone is having a great Summer! My kids head back to school in about 3 weeks..so we are enjoying every last minute that we can!

Sunday, July 4, 2010

Happy 4th of July!

How about celebrating with this Red, White and Blue Cream Cheese Poundcake, except I used blackberries instead of blueberries. The cream cheese makes this cake dense and moist, with the tang of the cream cheese, mixed with the sweetness of the berries and you can't resist another piece! This is another link that Beth sent my way and you can find the original recipe here.

Happy 4th of July!! Have a safe and fun day celebrating our freedom!
Red, White, and Blueberry Cream Cheese Pound Cake

2 sticks unsalted butter, softened, but not quite room temperature
1 8 ounce package of cream cheese, softened slightly
1 1/2 cups sugar
4 eggs
1 1/2 teaspoons pure vanilla extract
2 cups unbleached all-purpose flour
1 1/2 teaspoons baking powder
1 1/2 teaspoons kosher salt
6 ounces raspberries
6 ounces fresh blueberries---I used blackberries
lemon glaze (recipe follows)

1. Preheat oven to 325 degrees. Spray bundt pan with non-stick cooking spray, and place on a cookie sheet.

2. In a mixer fitted with the paddle attachment, cream together butter and cream cheese. Pour in sugar and mix until smooth. Add in eggs, one at a time, mixing well until each is incorporated.

3. While ingredients are mixing, whisk together four, baking powder, and salt in a separate bowl. Slowly add flour mixture to the wet ingredients.

4. Fold berries into batter.

5. Distribute batter evenly into pan and bake until a toothpick inserted in the center comes out clean, about 45-50 minutes. Let cool completely. Drizzle with lemon glaze.

Lemon Glaze
2 cups powdered sugar
juice of 1 lemon
2-3 tablespoons heavy cream

Mix all ingredients together until smooth. Add more juice or cream as necessary to achieve desired consistency.

Tuesday, June 15, 2010

Smore's Sandwich Bar Cookies

I have been away from The Cookie Carnival for some time now and when I got the email from Tami showing the new cookies for this month I knew I would be making these as soon as I could! You see, I have an addiction to gooey, roasted marshmallows. I just can't help myself when it comes to them...not sure where it comes from. Tami decided that for the Summer months we will have a kid friendly recipe along with the normal cookie recipe. As you can see, I went straight for the kid friendly one and let me tell you...I am so glad that I did. I couldn't get Abby or my boys in the kitchen to help me with these, but that's quite alright, they did their share in eating them! Seriously, these are amazingly good! Healthy, not so much...but honestly, it's worth the splurge!

I did have to improvise on a couple of things...I didn't have any Hershey bars, so I used semi sweet chocolate chips and no mini marshmallows, I had the large ones and just lined the top. I'm thinking next go around will have to include homemade marshmallows, you just can't go wrong with them.


S'mores Sandwich Bar Cookies
From: Hershey

Ingredients:
1/2 cup (1 stick) butter or margarine, softened
3/4 cup sugar
1 egg
1 teaspoon vanilla extract
1-1/3 cups all-purpose flour
3/4 cup graham cracker crumbs
1 teaspoon baking powder
1/4 teaspoon salt
1-1/3 cups (8-oz. pkg.) HERSHEY'S Mini Milk Chocolate Bars OR 5 HERSHEY'S Milk Chocolate Bars (1.55 oz. each)
3 cups miniature marshmallows

Directions:
1. Heat oven to 350°F. Grease 8-inch square baking pan. 2. Beat butter and sugar until well blended in large bowl. Add egg and vanilla; beat well. Stir together flour, graham cracker crumbs, baking powder and salt; add to butter mixture, beating until blended. Press half of dough in prepared pan. Bake 15 minutes. 3. Sprinkle mini chocolate bars over baked layer or arrange unwrapped chocolate bars over baked layer, breaking as needed to fit. Sprinkle with marshmallows; scatter bits of remaining dough over marshmallows, forming top layer. Bake 10 to 15 minutes or just until lightly browned. Cool completely in pan on wire rack. Cut into bars. 16 bars.

Tuesday, June 8, 2010

Chocolate Chip Cookie Bars

Last week Abby had her tonsils and adnoids out. It really has been alot tougher than I thought it would be. She has lost over 5 lbs and still isn't eating and the fever came back yesterday. Do you know how hard it is to get a 9 year old to eat nothing but soft things, when the said 9 year old doesn't really like jello, ice cream, pudding? Let me just say that she is growing tired of mashed potatoes.

Last night while we were talking about what she wanted to eat, she said that she was craving a warm, chewy chocolate chip cookie. I then remembered these bars that I had bookmarked from Donna of My Tasty Treasures. I thought maybe the edges of the cookies would be hard on her, and the bars would be a little easier. I still don't know the verdict of that yet, because the craving left her as soon as it came to her.

I did have to modify a couple of things...I didn't have any brown sugar, so I googled the substitute for it and you can mix 1 cup sugar with 2 Tbsp of molasses, I had some left from my gingerbread at Christmas, and you know what?? You can't tell a difference in the taste. My bars came out just a little bit dark from it..but no change in the taste. The recipe calls for 2 cups of chocolate chips, I had a cup of mixed peanut butter and chocolate chips, so I threw them in with some chopped up semi sweet chocolate and a bar of my dark chocolate that Beth sent me. Worked out perfectly! And with not having to wait for you butter to soften, you just melt and mix...go ahead and make some for yourself.

Chocolate Chip Bars
From: My Tasty Treasures

2 ⅛ cups (10 ½ ounces) all purpose flour
½ teaspoon salt
½ teaspoon baking soda
12 tablespoons butter (1 ½ sticks), melted and cooled slightly
1 cup (7 ounces) light brown sugar
½ (3 ½ ounces) cup granulated sugar
1 large egg
1 large egg yolk
2 teaspoons vanilla extract
2 cups chocolate chips

Directions
Preheat the oven to 325 degrees. Adjust the oven rack to lower-middle position. Line a 9X13-inch baking pan with foil, letting the excess hang over the edges of the pan by about 1 inch so you can grab those edges and pull the brownies from the pan after they have baked. Spray the foil-lined pan with nonstick cooking spray.

Mix the flour, salt, and baking soda together in medium bowl; set aside. Whisk the melted butter and sugars in a large bowl until combined. Add the egg, egg yolk, and vanilla and mix well. Using a rubber spatula, fold the dry ingredients into the egg mixture until just combined; do not over mix. Fold in the chocolate chips and turn the batter into the prepared pan, smoothing the top with the spatula.

Bake until the top of the bars is light golden brown, slightly firm to the touch, and edges start pulling away from sides of pan, 24–28 minutes. Cool on a wire rack to room temperature. Remove the bars from the pan by lifting the foil overhang and transfer them to a cutting board. Cut into 2-inch squares and serve.

Tuesday, June 1, 2010

Chewy Peanut Butter Cookies

The kids are out of school and we are just enjoying the weather. I can't believe that it has been over 2 weeks since I have posted last, but sometimes life just happens.

I found these cookies from Amanda's Cookin' and knew that I had to make them. Peanut butter cookies, or if I am being honest, anything with peanut butter is my all time favorite. These were quick to mix together with a short bake of 8 minutes and they were perfect. Soft and chewy, just what I needed!

Soft and Chewy Peanut Butter Cookies
From: Amanda's Cookin'

1/2 cup shortening (or butter flavored shortening)
3/4 cup creamy peanut butter
1 1/4 cups firmly packed light brown sugar
3 tbsp milk
1 tbsp vanilla
1 egg
1 3/4 cups all purpose flour
3/4 tsp salt
3/4 tsp baking soda

Preheat oven to 375 degrees F.

Combine shortening, peanut butter, brown sugar, milk and vanilla in large bowl. Beat with electric mixer at medium speed until well blended. Add egg. Beat just until blended.

Combine flour, salt and baking soda. Add to creamed mixture at low speed. Mix just until blended.

Drop by heaping teaspoonfuls (using a cookie scoop works great) 2 inches apart onto ungreased baking sheet. Flatten slightly in crisscross pattern with tines of fork.

Bake for 7 to 8 minutes, or until set and just beginning to brown. DO NOT OVERBAKE. Cool 2 minutes on baking sheet. Remove cookies to racks to cool completely.

Wednesday, May 12, 2010

Strawberry Turnovers

Spring has arrived here and the weather has been beautiful. We are having a blast just being outside and enjoying it. With that said, there hasn't been alot of activity in the kitchen. I have had this craving for a strawberry fried pied, but seeing how that really isn't the healthiest thing, I opted for this strawberry turnover. These turned out tasty and low sugar, which helps with the blood sugar levels. This recipe could be adapted to any fruit or filling of your liking.


Strawberry Turnovers
From: Cooking Light Desserts

1 lb strawberries, lightly chopped
1 Tbsp vanilla sugar, or regular sugar

4 (14x9 inch) sheets frozen phyllo dough, thawed
Butter-flavored cooking spray

1/4 cup sifted powdered sugar
1/2 tsp water
1/8 tsp vanilla

Preheat oven to 400 degrees.

Combine the strawberries and sugar into a bowl, and mix until combined.
Place 1 phyllo sheet on a damp towel (cover remaining dough to keep from drying out). Lightly coat with cooking spray. Place second phyllo sheet over first sheet, lightly coat with cooking spray. Cut stacked sheets lenghtwise into 3 equal strips (each about 4 1/2 inches wide).
Working with 1 strip at a time (cover remaining strips), place 2 Tbsp strawberry mixture at base of strip. Fold the corner over strawberry mixture to form a triangle. Continue folding triangle back and forth to end of strip. Place triangle, seam side down, on a baking sheet coated with cooking spray. Repeat with remaining 1 phyllo sheets and strawberry mixture. Coat triangles with cooking spray.

Bake at 400 degrees for 12 minutes or until golden. Remove from pan, and cool 5 minutes on a wire rack.

Combine powdered sugar, water, and vanilla, stirring until smooth. Drizzle sugar mixture evenly over turnovers.

Wednesday, May 5, 2010

Our first garden!


This year will be our first year planting a garden. I am enjoying watching the excitement in my kids! I didn't think that they would care at all about it, but to my surprise, they are just as excited as I am! Now, let's just pray that it all grows!!

Friday, April 30, 2010

No Bake PB/Chocolate Bars

You know those famous little no bake cookies?? These kind of taste like those...only deconstructed. I found these over at Buns in my Oven, and no it's not that kind of bun! There are tons of great looking recipes on her site, so go and check her out if you haven't already. The one thing that caught my eye with these is the small amount of sugar that you add to the mix.

No Bake Chocolate Peanut Butter Oatmeal Bars

Ingredients:
3/4 cup butter
1/2 cup packed brown sugar
1 teaspoon vanilla extract
3 cups quick cooking oats
1 cup semi-sweet chocolate chips
1/2 cup peanut butter (smooth or chunky)

1. Melt butter in a large sauce pan over low heat. Stir in brown sugar, vanilla, and oats. Cook for 3 to 4 minutes. Press half of mixture in to the bottom of a buttered 8 x 8 dish.

2. In a microwave safe bowl, microwave the chocolate and peanut butter, stirring every 30 seconds until melted and blended. Pour the chocolate peanut butter mixture over the crust, reserving a couple of spoonfuls to drizzle over the top.

3. Sprinkle the remaining oat mixture over the chocolate and peanut butter, pressing gently to form a crust. Drizzle the remaining chocolate and peanut butter over the top of the bars.

4. Refrigerate for 3 hours before cutting and serving.

Tuesday, April 20, 2010

Banana Bread

To be completely honest, there is nothing special about this banana bread. It is simple, moist, flavorful but nothing that just screams "make me". I did cut the sugar and added in some peanut butter and chocolate chips to the mix and it turned out great. So, here's the thing..if you have some bananas laying around that need to be used, make this bread. You won't be sorry.

Banana Bread
3 ripe bananas
1 1/2 cup all purpose flour
1 1/2 tsp baking powder
1/2 tsp salt
1/2 cup sugar
1/2 cup butter, melted
1 cup PB and chocolate chips, or chopped nuts (optional)

Preheat oven to 350 degrees.

Mash up bananas and mix flour, baking powder, salt and sugar until combined. Mix in the melted butter. Fold in PB and chocolate chips or nuts, if using.

Pour into loaf pan and bake for 45 minutes or until toothpick comes out clean.

Sunday, April 18, 2010

Chocolate Pudding Cake

I am currently addicted to Cooking Light Magazine. There are so many great looking recipes and all that I have tried have come out tasty. I have tried a couple of dinner recipes and they have turned out as well. This is another great one that will be made over again. You really can't go wrong with a slightly crunchy top with moist cake in the middle and as the base a warm pool of chocolate lava. Top it off with some no sugar added vanilla bean ice cream and you are still within the limits of still being a little bit better for you.

I should mention that this recipe was originally Mocha Pudding cake, but since the hubby and kids are very fond of mocha, I left that part out. :)

Chocolate Pudding Cake
From: Cooking Light

1 cup all-purpose flour
1 cup sugar, divided
6 Tbsp unsweetened cocoa, divided
1 1/2 Tbsp instant coffee granules
2 tsp baking powder
1/4 tsp salt
1/2 cup 1% low-fat milk--I used fat free milk
3 Tbsp vegetable oil
1 tsp vanilla extract
Cooking Spray
1 Cup boiling water
Vanilla love fat ice cream

Preheat oven to 350 degrees.

Lightly spoon flour into a dry measuring cup; level with a knife. Combine flour, 2/3 cup sugar, 1/4 cup cocoa, coffee granules, baking powder, and salt in a bowl. Combine milk, oil, and vanilla in a bowl; add to flour mixture, and stir well. Spoon batter into an 8 inch square baking dish coated with cooking spray.

Combine 1/3 cup sugar and 2 Tbsp cocoa. Sprinkle over batter. Pour 1 cup boiling water over batter (do not stir). Bake at 350 degrees for 30 minutes or until the cake springs back when touched lightly in the center (cake will not test clean when a wooden pick is inserted in center). Do not over bake. Serve warm with ice cream.

Note: This recipe is easy to double. Spoon into a 9x13 inch baking dish; bake at the same temperature and time/

Sunday, April 11, 2010

Triple Chocolate Cake


Can something this decadent be delish and still be not bad for you? The answer is YES!! I found some old Cooking Light magazines at a yard sale a couple of weeks ago for 25 cents, so I had to buy everyone they had. This recipe was in one of them. With trying to watch my blood sugar and eat healthier and getting my family eating healthier I knew that this one was one that I would have to try. Everyone in my little clan has a sweet tooth, so trying to find the balance between having the sweets and still being somewhat healthy has been some sort of a challenge. This cake was the perfect thing for the weekend. The texture is a little "spongy" as Blake my 12 year old described it, and the batter is a little thicker than a normal cake batter would be.

Triple Chocolate Cake

By: Cooking Light

1 (18.25 oz) package devil's food cake mix--I used a dark chocolate mix

1 cup fat free sour cream

1/3 cup fat free milk

1/4 cup vegetable oil

1 tsp almond extract

3 large egg whites

1 large egg

1 (3.9 oz) package sugar free/low calorie chocolate pudding mix

Cooking Spray

1 cup sifted powdered sugar

4 tsp fat free milk

1/3 cup semisweet chocolate chips

Preheat oven to 350 degrees.

Combine first 8 ingredients in a large bowl; beat at low speed for 30 seconds. Beat at medium speed 2 minutes. Pour the batter into a 12 cup Bundt pan coated with cooking spray. Bake at 350 degrees for 50 minutes or until a wooden pick inserted in center comes out clean. Cool in pan for 10 minutes; remove from pan and cool completely.

Combine powdered sugar and 4 teaspoons of milk in a small bowl, and drizzle over cake. Let stand 10 minutes. Place chips in a small heavy duty zip top plastic bag; seal. Submerge bag in very hot water until chips melt, or microwave at medium high for 1 minutes. Snip a tiny hole in 1 corner of bag, and drizzle chocolate over cake.

Wednesday, March 31, 2010

Low Sugar Pineapple Pudding Cake

I get daily emails from Taste of Home and this was one that I got earlier this week. I knew right then I would make it. This cake is on the healthy side and all the kiddos, including the hubby, liked it too. The recipe originally called for pineapple..and while that is good too...I could so see this with fresh sliced strawberries or bananas, even peaches. I think whatever fruit you like, it would go well with this dessert.

Pineapple Pudding Cake
From: Taste of Home

1 pkg yellow cake mix
1 1/2 cups cold fat free milk
1 pkg (1 oz) sugar-free instant vanilla pudding mix
1 pkg (8 oz) fat free cream cheese
1 can (20 oz) frozen fat free, sugar free whipped topping, thawed

Prepare cake mix batter according to package directions; pour into a 13x9 inch baking pan coated with cooking spray.

Bake at 350 degrees for 15-20 minutes or until a toothpick inserted near the center comes out clean. Cool completely on wire rack.

In a bowl, whisk milk and pudding mix for 2 minutes. Let stand for 2 minutes or until soft set.

In a small bowl, beat cream cheese until smooth. Beat in pudding mixture until blended. Spread evenly over cake. Sprinkle with pineapple; spread with whipped topping. Refrigerate until serving.

Monday, March 29, 2010

Vanilla Bean Angel Food Cake

With Spring here and the warmer weather showing its presence, what better way to celebrate than with a light and airy angel food cake with fresh berries? With trying to incorporate more healthy desserts in our lifestyle, I found this recipe from Cooking Light and just added in some vanilla bean. I love the extra vanilla that a vanilla bean gives.

I have talked to people that thought angel food cake was a hard thing to do, but it's really not. With just 6 ingredients, and you should have them all in your pantry, you can whip up this cake in no time and would be perfect a perfect dessert for the Easter weekend!

Angel Food Cake
From: Cooking Light

1 cup sifted cake flour, or all purpose
1 1/4 cups sugar, divided
10 egg whites
1 1/4 tsp cream of tartar
1/8 tsp salt
1/8 tsp vanilla extract, or 1/2 vanilla bean, split and scraped

Preheat oven to 350 degrees.

Sift together flour and 1/4 cup sugar; set aside. Beat egg whites with a mixer at high speed until foamy. Add cream of tartar and salt; beat until soft peaks form. Add remaining 1 cup sugar, 2 Tbsp at a time, beating until soft peaks form. Sift 1/4 cup flour mixture over egg white mixture, and fold in. Repeat procedure with remaining flour mixture, 1/4 cup at a time. Fold in vanilla.

Spoon batter into an ungreased 10-inch tube pan, spreading evenly. Break air pockets by cutting through batter with a knife. Bake at 350 degrees for 40 minutes or until cake springs back with lightly touched. Invert pan; cool 40 minutes. Loosen cake from sides of pan using a narrow metal spatula; invert cake onto a serving plate.

Friday, December 17, 2010

12 Weeks of Christmas Cookies Finale

This is the final week of the 12 WOCC, and although I don't have a cookie for you, I am linking up so that I can see what everyone else baked!

Thank you so much for baking along this year, it was a ton of fun and so many new recipes to try!

Happy Holidays!!!


Week 12 Twelve Weeks of Christmas:

Wednesday, December 8, 2010

Holidays....

The holidays are here and upon us and I honestly am having a hard time finding the time to even sit and think for a few minutes to myself. With that said I am taking a break until after the first of the year. I know, my fellow cookie bakers, I am bailing on you the last 2 weeks, and I am sorry, but honestly don't see cookie baking in my future until the week of Christmas. The next 2 weekends I am out of town and with holiday parties, kids chorus concerts, high school wrestling...they come first and then baking is second. That is just life for me right now.

I hope that everyone has a Merry Christmas and a Happy New Year!

Friday, December 3, 2010

Thumbprint Cookies-Week 10

One of my favorite cookies...I know, I say that alot, is thumbprint cookies. I am not sure what it is about them that I will choose first off of a goodie tray. I have shown you the Butter Meltaways that were filled with that sweet cream cheese filling, this week I am going with a butter cookie filled with your choice of jam. I have used raspberry, strawberry and apricot and all of them went well together, although my preference would be the tanginess of raspberry.
So here we are at week 10, only 2 more to go. I hope everyone is enjoying the holiday season so far!
Giant's Thumbprint Cookies
from: Gale Gand

8 oz. (2 sticks) unsalted butter, softened
2/3 cup sugar
1/4 vanilla bean, halved lengthwise, soft insides scraped out
1/8 tsp salt
2 cups plus 2 Tbsp all purpose flour
1/4 cup jam of your choice

Heat the oven to 350 degrees. Butter 3 sheep pans or use 1 pan and bake the cookies in 3 batches.

Cream the butter and sugar in a mixer fitted with a paddle attachment (or using a hand mixer) until fluffy. Add the vanilla scrapings and salt and mix until incorporated. Add the flour and mix at low speed until incorporated.

Using your hands, roll the dough into golf ball size balls and arrange them 2 inches apart on the cookie sheet flattening them out a bit as you go. Using your thumb, press the top of each cookie to make a shallow well. Roll your thumb back and forth to widen the well. Using a small spoon, fill the wells with jam.

Bake until very lightly browned around the edges, 25 to 30 minutes. Let cool slightly on the pan, then transfer to a rack to finish cooling. Store in an air tight container.


Week 10 Twelve Weeks of Christmas:

Monday, November 29, 2010

Hot Cocoa Bread-Week 9

I know, I am late. I am sorry. With the Holiday and family gatherings..time just got away from me. I hope you all had a fantastic Thanksgiving! I did, and I am sure I added a few pounds around the waistline as well.


This week I decided to do a quick bread. A few weeks ago I was contacted by Allison from Lake Champlain Chocolates asking if I would be interested in sampling some of their cocoa. It is organic and Fair Trade and would be perfect for any baking that I would be doing. Of course, I would love to try it!! And since this bread only uses cocoa, it would be perfect and I was not disappointed! I will be making this bread in mini loaf form, and will add a chocolate ganache to the top and add some mini marshmallows. My boys loved this so much that they finished the loaf in a day, and it was a big loaf! The recipe warned that it would make a big loaf to use the biggest loaf pan, I used the biggest one I had, and should have split it into 2 loaves. It overflowed from the top and took a little longer to bake.


This week is the first of December which means that we only have 3 more weeks of cookies left! And I need to tell my fellow cookie bakers, that I have not been ignoring your posts. My work place has decided to put a new firewall on our computers..which enables me to comment. I can look all day, but it blocks me to leave a comment. Once I get home for the day, the mommy in me takes over and I don't get alot of time to be online to comment. I mean, what do they expect me to do here?? work?? :)


Now, I have a surprise for you...keep reading on down and you'll see!

Hot Cocoa Bread:

from: Chickens in the Road

1/2 cup cream cheese, softened
1/4 cup butter, softened
1 1/2 cups sugar
1 egg
1 teaspoon vanilla
1 1/4 cups cocoa powder
1 1/4 cups buttermilk
2 1/4 cups all-purpose flour
1 1/2 teaspoon baking soda
1/2 teaspoon salt
3/4 cup mini marshmallows

Combine cream cheese, butter, and sugar. Cream with a mixer. Add egg and vanilla. Mix again. Add the cocoa powder and about 1/2 cup of the buttermilk; mix well. Add all the remaining ingredients (except the marshmallows) and stir to combine. Stir in the marshmallows.


Spoon into a greased loaf pan. This makes a large loaf–use your largest loaf pan.
Bake at 350-degrees for one hour.


Storey Publications sent me a copy of this book, A World of Cake to review. It is beautiful! I have to admit, I love a book with pictures...probably, if you don't have pics in the book...I am going to pass it up. The book gives you a world tour in cake form...have you ever wondered how they make the moon cakes that you see on blogland?? The recipe is in the book...funnel cakes?? it's there...name the cake, it is in there! You want a copy??? Just leave me a comment on this post. Tweet it, Facebook it...blog about it, come back and leave me another comment for more chances.

I will draw the winner and announce on This Friday's, December 3rd, cookie post.

Friday, November 19, 2010

Chewy Chocolate Cookies-Week 8

I have to be honest, there has been nothing baking in my kitchen this week. So, I thought we could take a trip down memory lane. I made these last year and they quickly became one of my favorites. If you need a recipe that will make alot of cookies...say 6 dozen...this one is for you!
Want the recipe? Go here.
Happy Baking! Make sure to check out the other cookie bakers!


Week 8 Twelve Weeks of Christmas:

Friday, November 12, 2010

Butter Meltaways--Week 7

Can you believe that we are over half way mark? Week 7 and we have 5 more weeks to go. I make these every year for Christmas, these are the ones that will always be on my goodie trays. They are simple and quick and delicious!

Butter Meltaways with Cream Cheese Frosting
By: Paula Deen

1 1/4 cup all purpose flour
1 cup butter, softened
3/4 cup cornstarch
1/3 cup confectioners sugar

In a large bowl, combine all ingredients. Beat with an electric mixer at medium speed until fluffy.

Separate dough into 4 equal parts and roll each into a smooth log. Wrap each log in flour dusted wax paper. Chill dough for at least 6 hours. After six hours, allow dough to sit out for 15 minutes to soften.

Preheat oven to 350 degrees. Grease baking sheets.

Slice dough into 1/4 inch thick slices and place on prepared baking sheets. Bake 10 minutes. Cool completely on wire racks.

Frosting:
1 cup confectioner sugar
1 (3 oz.) cream cheese, softened
1/2 tsp vanilla
1/2 to 1 drop food coloring

In a medium bowl, combine all frosting ingredients. Beat with an electric mixer until creamy. Pipe or dollop a small amount on top of cooled cookies.

***Here are my notes on this recipe. This recipe calls to make 8 dozen cookies. That is why you roll it into logs. I did not do this. I also did not chill my dough. Once it was mixed, I rolled it into 1 inch balls with floured hands and it worked fine. When I roll it out and cut into shapes, then I chill it, but not for 6 hours. Only until it is firm enough to roll.***

Week 7 Twelve Weeks of Christmas:

Friday, November 5, 2010

Cranberry Dark Chocolate Chunk Oatmeal Bars-Week 6

Oh my people, we are at week 6 of the 12 Weeks of Christmas cookies! I thought all week that this is week 5, it has been that kind of week. These weeks just keep going by quicker and quicker! I don't know about you, but I am excited to see all the Christmas decorations going up in the stores and I have noticed the holiday commercials starting to show up. :)


This week I needed something comforting and easy. I went back to the Oatmeal Raisin cookies I made for Week 2, subbed the raisins for dried cranberries and added some dark chocolate. I think I like cookie form better than the bar form, but the hubby loved them, even though he doesn't like cranberries.


Oatmeal Raisin Cookie Bars

Adapted from: Quaker Oats

1/2 cup (1 stick) plus 6 tablespoons butter, softened

3/4 cup firmly packed brown sugar

1/2 cup granulated sugar

2 eggs

1 teaspoon vanilla

1-1/2 cups all-purpose flour

1 teaspoon baking soda

1 teaspoon ground cinnamon

1/2 teaspoon salt

3 cups oats

1 cup dried cranberries

1 cup dark chocolate chunks


Heat oven to 350°F.

In large bowl, beat butter and sugars on medium speed of electric mixer until creamy. Add eggs and vanilla; beat well. Add combined flour, baking soda, cinnamon and salt; mix well. Add oats, cranberries and chocolate; mix well.

Drop dough by rounded tablespoonfuls onto ungreased cookie sheets.

Bake 7 to 9 minutes or until light golden brown. Cool 1 minute on cookie sheets; remove to wire rack. Cool completely. Store tightly covered.

Friday, October 29, 2010

Potato Candy-Week 5


One of things that I remember my mom making every Christmas is this potato candy. She learned from her granny, who is someone I wished I could have known. I hear I am just like she was. Before now, I never could get this candy to turn out. It is strange to me how when you add powdered sugar to a boiled potato, it liquefies...resulting in adding more sugar until it becomes a ball of dough. So before now, I would cheat. I would take a can of vanilla frosting and a 1 lb box of powdered sugar mix it all together until a ball would form. Hey, it worked for me and my mother would always say "your granny would not be proud", in my defense, I never met the woman so how would I know? She should have left me some sort of book. :)


Week 5 of the 12 Weeks of Christmas Cookies is here and that leaves 7 more weeks of some yummy things! I can now say that my Great Granny would be proud of me for making this the way she would. I now don't have to buy the canned stuff, because I now have the potato candy making as a success!


I think I should go ahead and tell you that I don't have an exact recipe, I'll just kind of explain how I did it. :)


Potato Candy


1 small potato, peeled, quartered and boiled until done


2lb bag of powdered sugar


Peanut Butter


Put the cooled potato in a medium bowl (I used my mixer with the paddle attachment) slowly add the powdered sugar, the potato will become liquefied, keep adding the powdered sugar until it forms a ball. You won't use the whole bag of powdered sugar, but you may need a little more or less than the 1 lb box. Once you have a ball, lightly dust your workspace with the powdered sugar and roll out the dough to the thickness that you like. Spread with peanut butter, and again, this is to your liking add as much or as little, just make sure that if you add more that your seam is sealed so it doesn't leak out when rolled up. Roll you dough pinwheel style and once rolled slice into slices.

Week 5 Twelve Weeks of Christmas:


Tuesday, October 26, 2010

Maggot Pudding with cockroaches for The #GreatHallowTweet Bloghop

Day 2 of The #GreatHallowTweet Bloghop and I give you maggot pudding with cockroaches. Sounds delicious, huh? Don't be afraid...it really is tasty!

Make sure to visit the links on the sidebar for more Halloweenie treats!!

Maggot pudding with cockroaches

1 3/4 cup water
1/2 cup rice
1/8 tsp salt
1/2 cup fat free milk
3 Tbsp honey
1/4 cup cranberries, or more for your tasting

Put the water in a medium saucepan and heat on medium heat until boiling. Add rice and salt and cook until water is absorbed, about 30-45 minutes. Add the milk, honey and cranberries and cook for 10 more minutes until thickened and creamy. Serve warm or chilled.

Monday, October 25, 2010

Orange Chocolate Dirt Balls-The #GreatHallowTweet Bloghop

It is day 1 of the #GreatHallowTweet Bloghop hosted by Renee from Flamingo Musings, and it is sure to be a ton of fun and give lots and lots of those Halloween treats that we love...either it be simple and sweet...or gross, either way..check out the linky on the sidebar and see what 17 other bloggers are coming up with.

For today, I chose to go a little short and sweet but something that just says Halloween when you look at them. Orange chocolate dirt balls, or oreo bon bons. When I think of Halloween, sweet comes to mind...chocolate, candy bars...the sticky gummy candies..cookies. So what better way for me to kick off this week than these little balls. You have the darkness, the blackness...from the oreo cookies and then the hard shell of the orange chocolate...the perfect colors for the day right?

Dirt Balls

1 package of oreo cookies
1 8 oz. cream cheese, room temperature

1 package of white chocolate melts, I used Wilton Candy Melts

Put all the Oreo cookies in a food processor and process until all cookies are finely crushed. Put into a medium bowl and mix with the cream cheese. Roll into balls and put onto a cookie sheet lined with waxed paper.

Melt the candy melts in a double boiler and dip the oreo balls until completely covered. Place back on the waxed paper and let sit until the chocolate is set..or if you are like me and not that patient..put into the freezer for a minute or two.

Friday, October 22, 2010

Candied Ginger Butter Cookies-Week 4

A few week ago Beth sent me a package of candied ginger. I wasn't sure what I would do with it so I thought I might just munch on it...have you ever tried it?? Boy, does it have a bite to it! I don't think that will become my snack of choice. So, while flipping through some old magazines, I came across this cookie and knew that it would be perfect to use the ginger and this weeks cookie.

Yes, we are at week 4 of cookies and I am still just as excited each week as the first to see what everyone comes up with. This cookie was not at all what I expected, but you know what? I love it! It is kind of like a spiced up shortbread, but soft and chewy in the middle. And you know, I really like the bits of the ginger in them. I will be making them again and think I will add a little more of the chopped candied ginger.

Candied Ginger Butter Cookies
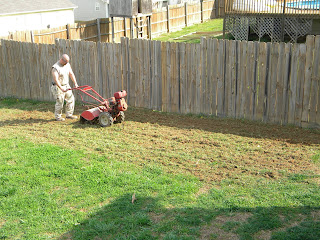
1 cup butter, softened
1/3 cup sugar
1/3 cup brown sugar
2 tsp vanilla
1 tsp ground ginger
1/2 tsp cinnamon
1/4 tsp salt
2 cups all purpose flour
2 Tbsp crystallized ginger, finely chopped


2 oz bittersweet chocolate, finely chopped
1/2 tsp shortening


Preheat oven to 325 degrees. Line a cookie sheet with parchment paper; set aside. In a large bowl, beat butter with an electric mixer on medium to high speed for 30 seconds. Add sugar, brown sugar, and vanilla. Beat until combined, scraping bowl occasionally. Beat in the ground ginger, the cinnamon, and salt until combined. Using a wooden spoon, gradually stir in flour and the crystallized ginger.


Divide dough in half. On the prepared cookie sheet, press one portion of dough into a 10x2 1/2 inch rectangle. Bake for 22 to 24 minutes or until top is golden brown and edges are set. Cool on cookie sheet for 10 minutes. Cut rectangle crosswise into 1/2 inch wide sticks. Transfer cookies to a wire rack; let cool. Repeat with the remaining dough.


Melt the chocolate and shortening in a small bowl in the microwave until smooth. Drizzle over cooled cookies and let stand until the chocolate sets.

Week 4 Twelve Weeks of Christmas:

Tuesday, October 19, 2010

Peach Crumb Pie Bites


With it finally feeling like fall here, this week anyways, we did have a few days last week with temps back near 90. I wanted to have one last taste of Summer and these hit the spot. With them being two bite size, just grab and go, only I grabbed and went several times! Although I went with peach filling, you can always change up the fruit filling..apple, cherry, pear..whatever your tastebuds are calling for!

There are a couple of things I will tell you about the recipes. The dough recipe makes 24 mini pies. The filling recipe makes about double of what you need..so make it and freeze half, or double your dough and make more of these babies...I am sure you won't get any complaints. :) And the crumb topping makes double of what you will need too, so you may want to half that recipe.

Peach Crumb Pie Bites

Dough:
1/2 cup butter, softened
3 oz cream cheese, softened
1/4 cup powder sugar
1 cup flour

Filling:
4 large peaches, peeled, pitted, and finely chopped
1/2 cup firmly packed brown sugar
2 tbsp butter, melted
1 tsp vanilla extract
1/8 tsp ground cinnamon
1/8 tsp salt
1/8 tsp ground nutmeg

Crumb topping
1/2 cup flour
1/4 sugar
2 Tbs. brown sugar
1/4 tsp. cinnamon
1/4 tsp salt
1/4 cup butter, room temperature

Crust:
Beat the butter and cream cheese until smooth. Add the powdered sugar and beat until well incorporated. Add the flour and mix scraping down the sides until just combined. The dough should be soft and slightly sticky. Scoop and roll into small 1 inch balls and place in the cups of an ungreased mini-muffin tin. Press in the bottom and up the sides of the cups in the muffin tins. Set aside the shells. Preheat the oven to 350 degrees.

Filling:
Put the peaches, brown sugar, butter, vanilla, cinnamon, salt and nutmeg in a medium saucepan over medium heat. Cook until peaches are tender, about 30 minutes. Set aside.

Crumb topping: Mix the flour, sugars, cinnamon and salt together in a bowl with a fork. Cut the butter in using two butter knives until it resembles small peas.

Place a small scoop of the peach filling into each mini shell, filling to the top. Sprinkle on a good amount of the crumb topping pressing slightly to adhere. Place in the oven and bake for 20-25 minutes or until the top is slightly browned and the shells are a golden brown. Remove from the oven and let them cool in the pan for 3 minutes. remove them from the pan and let them cool on a cooling rack.

Friday, October 15, 2010

Whoopie Pies-Week 3


This week I chose to go with whoopie pies. It is my son, Blake's, birthday so these were perfect for today. There are so many ways you can make them. I have made them before a while back, but wanted to go with a "cake" flavor this time around. You can definitely make these festive using Christmas sprinkles or color the batter. The filling possibilities are endless as well.

So, here we are at week 3, leaving 9 more to go!! There are over 50 cookie bakers, so that is alot of cookies each week! I don't think that any of us will have any trouble making our trays for this year!


Birthday Cake Whoopie Pies

For the cookies:

8 tbsp. unsalted butter, at room temperature
¾ cup sugar
2 tsp. vanilla extract
2 large eggs
2¼ cups all-purpose flour
1½ tsp. baking powder
¾ tsp. salt
½ cup milk


Preheat the oven to 375˚ F. Line two baking sheets with parchment paper or silicone baking mats. Combine the butter and sugar in the bowl of an electric mixer and beat on medium-high speed until light and fluffy, about 2 minutes. Blend in the eggs one at a time, beating well after each addition. Blend in the vanilla. In a medium bowl combine the flour, baking powder, and salt; whisk to combine. With the mixer on low speed, add the dry ingredients to the bowl, alternating with with the milk, and beating each addition just until incorporated.

Using a cookie scoop, scoop your batter and place an inch or two apart. Bake 8-10 minutes, until the cookies are set (they should not brown.) Transfer to a wire rack to cool completely. Repeat with any remaining batter as necessary.

Buttercream:
1 sticks of butter, room temperature
1 tsp vanilla extract
4 cups powdered sugar
2 Tbsp milk

Cream the butter and vanilla together, gradually add the powdered sugar and milk until you get the consistency you want. Add more as needed.

Chocolate Buttercream: Use the above recipe and add 4 heaping Tbsp.

Week 3 Twelve Weeks of Christmas:


Friday, October 8, 2010

Oatmeal Raisin Cookies-Week 2

Here we are at week 2, and that leaves 10 to go...10 week until Christmas!! I have a confession..until now, I have never made an oatmeal raisin cookie. I have been married 16 years and these are the hubby's all time, hands down favorite, and I have never made them! I have not been a very good wifey. :) I guess the reason for that is because I never really like them. I think it's funny how your likings change. I eat things now that I would have never touched maybe 10 years ago. It's a funny thing. :)

Although, I love a good goodie tray with all kinds of fancy things, I also think that sometimes simple is best. I think that every tray should have a simple chocolate chip cookie and now I think they need a simple oatmeal raisin cookie. These cookies are soft and chewy..sweet with a hint of cinnamon and they are just as good the next day.

Oatmeal Raisin Cookies
From: Quaker Oats

1/2 cup (1 stick) plus 6 tablespoons butter, softened
3/4 cup firmly packed brown sugar
1/2 cup granulated sugar
2 eggs
1 teaspoon vanilla
1-1/2 cups all-purpose flour
1 teaspoon baking soda
1 teaspoon ground cinnamon
1/2 teaspoon salt
3 cups oats
1 cup raisins

Heat oven to 350°F.

In large bowl, beat butter and sugars on medium speed of electric mixer until creamy. Add eggs and vanilla; beat well. Add combined flour, baking soda, cinnamon and salt; mix well. Add oats and raisins; mix well.

Drop dough by rounded tablespoonfuls onto ungreased cookie sheets. Bake 7 to 9 minutes or until light golden brown. Cool 1 minute on cookie sheets; remove to wire rack. Cool completely. Store tightly covered.
Week 2 Twelve Weeks of Christmas:   

Monday, October 4, 2010

Chocolate Bundt Cake and Peanut Butter Glaze


I needed something fairly quick and simple to make for our game day party on Saturday. Cake seems to go well for both the adults and kids and what better combo than peanut butter and chocolate? This seems to be my go to chocolate cake recipe when I want to make a bundt cake. It is from Askinosie Chocolate and is fabulous! I am out of their cocoa (I guess I should order some!), so I used what I had in the cabinet and it worked out fine. The PB glaze is something I just kind of winged, so we'll just have to go with it. :)


Askinosie Chocolate Cake
2 cups sugar
2 cups flour
1 stick of butter
1/2 cup vegetable oil
4 Tbsp (heaping)Askinosie cocoa powder
1 cup water
1/2 cup buttermilk
1 tsp vanilla
1/2 tsp salt
1 tsp baking soda
2 eggs

Preheat oven to 350 degrees. Grease and flour 9x13 pan. (I used a bundt pan)
Mix sugar and flour together in a large mixing bowl, set aside. Melt butter in a small pan on the stove. Add vegetable oil, cocoa and water. Bring to a boil. Pour cocoa mixture into sugar/flour mixture. Mix for 5 minutes. Add buttermilk, vanilla, salt, baking soda and eggs and mix again until thoroughly combined. Pour into baking pan, bake for 30-35 minutes. Let cake cool completely before serving.


Peanut Butter Glaze
Basically, here is what I did...heated about 1/2 cup milk and mixed in 1/4 cup of creamy peanut butter until smooth. I dumped some powdered sugar in the mixer bowl...probably around 2 cups?? and then I just added the pb/milk mixture until it came to the consistency I wanted. Simple enough, huh? :)

Friday, October 1, 2010

Week 1--Cheesecake Cookies

I know it seem crazy to be talking about Christmas already, but I believe that you can never have too many cookies around the holidays. You may remember last year there was only a handful of us that baked, but I am so excited that this year we have close to 30 of us baking along...I can hardly stand myself thinking of all the cookies that will be made!


We are a family of cheesecake lovers, what better way to start off the first week with a cheesecake cookie? No better time than the present I say. I liked these cookies and will probably make these for my goodie trays this year. The texture reminded me of shortbread with a little tanginess (is that a word?!) from the cream cheese that is added. You could also roll these in any type of coating you want, I chose to go basic with graham cracker crumbs. You could also put some chocolate in the middle..I may go with a rolo candy in the middle the next time. The possibilities are endless on topping/filling combinations. Happy Cookie Baking!!!


Cheesecake Cookies


3/4 cup unsalted butter, softened
3 ounces cream cheese
2/3 cup sugar
1 tsp vanilla extract
2 cups All-Purpose Flour
Graham Cracker Crumbs, for coating


Preheat oven to 375 degrees.


In a large bowl, beat together butter, cream cheese, and sugar. Mix in vanilla extract. Stir in the flour until well combined.


Scoop the dough and form into 1" balls. Roll in graham cracker crumbs so cookie is covered.


Place covered cookie balls onto the prepared baking sheet. Bake for 12 to 15 minutes, or until the edges are golden and the tops are slightly puffed.


Week 1 Twelve Weeks of Christmast:

Wednesday, September 29, 2010

Pineapple Upside Down cupcakes

Some people like, some people don't..I happen to love pineapple upside down cake. This was one of our desserts over the weekend, and it was so nice that you could just pick one up and go instead of having to cut a piece of it from a cake. I did have one little issue, I think I put too much of the brown sugar mixture in the bottom because it ended up coming out of the tops of the muffin pan and down in my oven causing my kitchen to look like we were in a fog..but it didn't effect the taste of these. They still had that sweet topping that we all love!

Pineapple Upside Down Cupcakes

Topping:
1/3 cup brown sugar, packed
1/3 cup unsalted butter, melted
12 pineapple rings, I used pineapple chunks
12 maraschino cherries

Cake:
1 cup all purpose flour
3/4 cup sugar
1/2 tsp baking powder
1/4 cup unsalted butter, room temperature
1/2 cup pineapple, juice, reserved from can
1/2 tsp vanilla extract
1 egg

Preheat oven to 350 degrees. Spray a 12 cup muffin pan with baking spray or grease with butter. Drain the pineapple, reserving the juice for the cake batter. Combine brown sugar and melted butter in a small bowl. Evenly divide among each of the muffin cups, about one teaspoon per cup. Cut about 1/3 out of each pineapple ring and arrange over the brown sugar mixture...this is where I just placed the pineapple chunks in a circle. :) Add a cherry in the center of each ring.

In a mixing bowl, combine flour, sugar and baking powder. Add butter, pineapple juice and vanilla and beat on low until just combined. Increase speed to medium and beat two minutes. Add the egg and beat in until well incorporated. Evenly divide the batter among the muffin cups, filling each about 3/4 of the way full. Bake approximately 25-30 minutes until a toothpick inserted in the center comes out clean. Cool the cupcakes five minutes in the pan and then flip onto ta platter or covered rack.

Thursday, September 23, 2010

Pepperoni Pizza Bites

Normally I would only post something sweet, but I thought these deserved a posting. :) As I said before, we had a "glutton buffet" over the weekend and these were one of the finger foods that I made. I saw these on Megan's Cookin' and knew that I would make them at some point. We are always making some sort of finger food, whether it be for a football game or over the holidays. These were perfect little bites....popular with the 10 kids that were at my house and the adults munched on them too. I did make a couple of little changes, I doubled the recipe to make 4 dozen mini's and added some pizza seasoning to the mix. Not a fan of pepperoni? The combinations are endless in these. Serve with a side of marinara sauce and enjoy!

Pepperoni Pizza Bites
adapted from: Megan

1 1/2 cup flour
1 1/2 teaspoon baking powder
1 1/2 cup whole milk
2 eggs, lightly beaten
2 cups colby jack cheese, shredded
2 cups pepperoni, chopped
1 1/2 tsp pizza seasoning

Preheat oven to 375 degrees.

Grease a mini muffin tin.

In a large bowl, whisk together the flour, baking powder and pizza seasoning; stir in the milk and egg.

Stir in the cheese and pepperoni; let stand for 10 minutes.

Stir the batter and divide among the mini-muffin cups.

Bake until puffed and golden, about 25 minutes.

Tuesday, September 21, 2010

Chewy Sugar Cookies

While I was on my blogging break, it was like the baking bug just bit my right leg off..truth is, I stress bake. Being in my kitchen is therapy, I think I have admitted that before, and I just couldn't stop. Luckily, I did take pics and hopefully will get those posts up. I found these cookies over on My Baking Addiction, Chewy Lemon Sugar Cookies. I love lemon, anything lemon and will probably pick a lemony dessert over a chocolate one, so I knew that I had to try these. This cookie is kind of bittersweet for me...disappointed that the lemon really didn't come out in these..and that is probably mostly my fault. I didn't add the lemon zest. But, the batter was wonderful..lemony, sweet..just want I needed in a cookie. BUT...after baked..you couldn't taste the lemon at all. Bummer. But, I do have to tell you that this was probably the best chewy sugar cookie I have had. I normally won't ever choose a sugar cookie because they always seen crumbly and dry to me. Not these, they were delish and the kids and hubby gobbled them up.

Chewy Sugar Cookies
adapted from My Baking Addiction

2 3/4 cups all-purpose flour
1 teaspoon baking soda
1/2 teaspoon baking powder
1/2 teaspoon salt
1 cup butter, softened
1 1/2 cups white sugar
1 egg
1/2 teaspoon vanilla extract
1/2 cup sugar for rolling cookies

Preheat oven to 350 degrees. Line cookie sheets with parchment paper.

In a small bowl, stir together flour, baking soda, baking powder and salt. Set aside.

Using a mixer, beat together the butter and sugar until smooth and very fluffy. Beat in egg, vanilla extract, lemon juice and lemon zest. Gradually blend in the dry ingredients. Roll rounded teaspoonfuls of dough into balls, and roll in sugar.

Place on lined cookie sheets about 1 1/2 inches apart. Bake 8 to 10 minutes in the preheated oven, or until lightly browned. Let stand on cookie sheet two minutes before removing to cool on wire racks.

Makes approximately 24-30 cookies depending on size

Friday, September 17, 2010

2 weeks and counting.....

We are now on the count down for the first week of the 12 weeks of Christmas cookies bake along. Here is who I have so far that is going to be cookie baker for the next 12 weeks.

Barbara from Barbara Bakes
Megan from Megan's Cookin
Megan from My Baking Adventures
Jamie from Mom's Cooking Club
Tracy from SugarCrafter
Beth from You Know What you Oughta Do
Heidi from With Thankful Hearts
Stephanie from Dispensing Happiness
Katy from Alphabet Soup
Tania from Love Big, Bake Often
Avril from Baking and Creating with Avril
Tracy from Mid-Western Girl with a Texas Address
Randi from Little Food, Lot of Flavor
Lina from Crustabakes
Stephanie from Bite by Bite
Lisa from Sweet as Sugar Cookies
Chaya from Chaya Comfy Cooks
Bree from Baked Bree
Megan from Less Than Adventurous
Pam from From Apples to Zucchini
Melynda from Melynda's Muffins..errr..Food Madness
Dajana from Baker's Corner...Somewhere in my Kitchen
Jennifer from Maple n' Cornbread
Chip from Cooking with Chip
Trisha from My Hobbie Lobbie
Katrina from Baking and Boys
Renee from Flamingo Musings
Krista from Meet the Swan's
Amanda from Fake Ginger
Wende from The Rickett Chronicles
Joy from Joy's Misadventures
Mary from Bites and Bliss
Diana from The Iron Maiden
Maggie from Ceo A's Draiocht
Cara from The Boys Made Me Do It
Erin from Making Memories
Rachael from Rachael Raves
Hannah from City Baked
Sue from Munchkin Munchies
Katie from Level 2 Mommy
Samantha from Bikini Birthday
Bonnie from City Home Country Home
Beth from A Nutmeg Kitchen
Louann from Louanne's Kitchen
Marcellina from Marcellina in Cucina
Lee Ann from C'est si bon Sweets and Treats
Alexandra from Peace Love Sprinkles
Martha from Seaside Simplicity
Mickey from Monster Mama
Rachel from Rachel's Bite
Tamy from 3 Sides of Crazy
Manoela from Dessert First

If I left you off, please, please, please forgive me!!! Also, if you haven't received an email from me, let me know. I have a couple of pieces of info to pass along! I am super excited! :) Start looking through those cookie recipes girls, I have cookie trays to start planning!

As I mentioned before the hubby told me I needed to start blogging again. It is so true. Isn't it funny how blogging becomes a part of you? I love blogging, love the friends that I have made and the ones that I haven't yet and I miss it. But, I also realize that you have life to live. Life just happens. I have to find that balance.

So, today is my anniversary. I have been married 16 years today! Wow, the time flies. Tomorrow TN plays FL and honestly, we are going to lose. And if I am being honest...I don't really like to watch football on TV..I just like to get together with great friends and eat. This weekend is not different, I have officially named it "Glutton Buffet Day" because yes, my friends, we have that much food planned and I will probably gain 10 pounds. So, I should have something new to blog about next week. :) Have a great weekend!

Monday, September 13, 2010

Just curious.......

What does it mean when your hubby tells you that you really need to start blogging again?? That is makes you happier???

I'm thinking he just misses the goodies!

Tuesday, September 7, 2010

Hey there!


Did you think that you could get rid of me that easy? Just kidding. I got an email from Barbara, who got an email from Jamie, asking if we would be cookie baking again this year. Remember our 12 weeks of Christmas cookies? I know...it is crazy to even be thinking of this with temps still in the 90's...but...it is that time to start thinking.

Put on your cookie thinking hats and bake along with us this year. The first post will be on Friday October 1st and each Friday after that with our last being on December 17th. Yep..that is 12 weeks.

I need to add a couple of details. You get to choose whatever you want to make for that week. I know that I have a ton of recipes bookmarked, printed, ripped out of magazines. This is the time to try them out. Also, if you want to make a bar, or even a candy for that matter..if it is something you put on your goodie trays, we want to know about them. :)

Will you be cookie crazy with us? You know you want to....oh, and I need some new cookies for my trays this year. :) I hope you will! If so, comment here or shoot me an email, I would love an email. :)

Monday, August 30, 2010

Let's chat.....

I think it has come to the time that have to admit that I need a break from this little blog. I have put it off and put it off, but since it has been a month since I have posted last, it is time. There are some things going on my my little life that require my time and attention and I don't see it lightening up any time soon.

When I started blogging I never expected that I would make so many friends. Blogging friends are the best! :)

So, I will leave it as this.....I will still be around reading the updates from you and at some point I hope to be back.

Happy Baking!!

Thursday, July 29, 2010

Blackberry Pie Bars


Blackberries are in season here right now, and since I have a great hubby that works outdoors...he finds the best blackberry patches that are just there for the picking. There is just something calming to me about berry picking or any kind of picking for that matter. I could pick for hours and I did just that with these berries. It makes me happy! :)

We had a cookout with our church this past Sunday and had so much fun! I made these to take. I don't know..but when we have a get together and I need to take something, bars always come to mind. They are easy to just pick up and go.

These bars have a sweet crust with a moist, gooey filling and then the crunch on top. I will make them again and probably try different berries in them or maybe peaches!

Blackberry Pie Bars

For the dough:
1 1/2 cups All Purpose Flour
3/4 cup sugar
3/4 cup cold butter, cut into cubes
Zest of one lemon
Pinch of salt

1. Rub zest of lemon into sugar using the back of the spoon creating a lemon scented sugar.

2. In the bowl of your mixer, dump in flour, sugar/lemon zest mixture, butter and salt. Beat with the paddle attachment for a couple of minutes until the dough comes together in small chunks.

3. Press half of the dough into the bottom of a greased 9 x 13 pan. Set aside the remaining dough.
4. Bake the dough for 10 minutes in a preheated 350 degree oven. Let cool for 10 minutes.

For the filling:
2 large eggs1 cup sugar
1/2 cup sour cream
1/2 cup all purpose flour
3 cups blackberries (if using frozen, thaw and drain first)

1. Whisk the eggs in a large bowl. Add sugar, sour cream and flour to the eggs. Mix well and then fold blackberries.

2. Pour blackberries over baked crust and spread evenly.

3. Sprinkle the reserved dough on top of the blackberry mixture and bake for 50-60 minutes.

4. Let cool one hour before serving.

Saturday, July 24, 2010

Chocolate Butter Cupcakes with Vanilla Bean Buttercream

For the past couple of days I have been craving a chocolate butter cake with vanilla bean butter cream frosting. Why? I have no earthly idea..but I am so glad that I finally caved. These cupcakes turned out just what I wanted...moist, buttery,chocolaty, light...I could go on and on. The recipe also made a ton! I ended up baking 2 dozen regular sized cupcakes and 3 dozen mini's..you know, I had to make sure that there would be enough to go around! :)

The butter cream is just a simple butter cream, and I used vanilla bean paste to get the vanilla bean flavor and the little specks in the frosting. Those little specks make me happy! I like it because you don't have to scrape the actual vanilla bean, and it is cheaper and goes a little further.

The weather here has been just plain hot! For the past 2 days the heat index has been at least 105. That is just way too hot! So, these little babies are helping me beat the heat. I mean, what can be better? Sitting in the AC, eating cupcakes? I can't think of anything better...other than maybe sitting by the ocean eating a cupcake. :)


Chocolate Butter Cupcakes:

4 oz unsweetened chocolate, chopped
1/3 cup unsweetened cocoa powder
1 cup boiling water
2 1/4 cups all purpose flour
2 tsp baking powder
1 tsp baking soda
1/4 tsp salt
1 cup unsalted butter, room temp
2 cup sugar
3 large eggs
2 tsp vanilla
1 cup milk

Preheat oven to 350 degrees. Line cupcake tins with liners.

In a heatproof bowl place the chopped unsweetened chocolate and cocoa powder. Pour the boiling water over the chocolate and cocoa powder and stir until they have melted. Set aside to cool while you make the batter.

In a separate bowl, whisk to combine the flour, baking powder, baking soda and salt.

In the bowl of your electric mixer or with a hand mixer, beat the butter until smooth and creamy. Gradually add the sugar and continue beating until the mixture is fluffy. Add the eggs, one at a time, mixing well after each addition. Scrape down the sides of the bowl as needed. Add the vanilla and melted chocolate mixture and beat to combine.

Add the milk and flour mixtures in three additions, beginning and ending with the flour mixture. Beat only until the ingredients are incorporated.

Divide the batter evenly into lined muffin tins. Bake the regular sized cupcakes for 12 minutes and the mini's 8-10 minutes.

Vanilla Bean Butter cream:

1 stick unsalted butter, room temp
1 Tbsp vanilla bean paste or one vanilla bean scraped
2 lb bag of powdered sugar
milk

Cream the butter and add the vanilla bean paste and mix until combined. Gradually add the powdered sugar and add milk as you go along to get the consistency you want.

Friday, July 23, 2010

An idea of sort......

As some of you already know, I have a huge addiction to food magazines. I can't help it, but I figure there are worse things that I could be addicted too. While I was looking through them, I had a thought and thought that I would just throw it out here and see if anyone is interested.

I am wondering if you (anyone) would be interested in doing a food magazine swap. I don't know..every month or so, we would swap 2 or 3 magazines with a partner. The only thing that you would be responsible for would be the postage. What do you think? Something you might want to do? Let me know!

Monday, July 19, 2010

So....since I haven't really been baking anything, I thought I would just pop in here and give a little update on the garden. This is my first garden and I am super excited with the produce that I have gotten from it and what I am still getting. The picture above is what I harvested today. I planted cucumbers, spinach, squash, zucchini, green beans, okra, brussel sprouts and tomatoes. The spinach didn't make it and the squash and zucchini are about done too. The okra is just now starting...and I really don't know what to expect with the brussel sprouts. I have never seen them grown, so it is a watch and see kind of thing.

I have enjoyed everything in my garden..from tilling the ground to planting the seeds. Watching them sprout and now getting to harvest. My kids have enjoyed it and it makes me happy to see that they are eating from our back yard. It is such a good feeling to know that we grew it and there was nothing harmful added to it. If you have ever watched Food Inc., then you know what I am talking about.

I am already planning next years garden and planning to expand it. I would highly suggest to anyone to is questioning the idea of a garden...do it! The benefits from it....well, it just makes you smile!

I hope everyone is having a great Summer! My kids head back to school in about 3 weeks..so we are enjoying every last minute that we can!

Sunday, July 4, 2010

Happy 4th of July!

How about celebrating with this Red, White and Blue Cream Cheese Poundcake, except I used blackberries instead of blueberries. The cream cheese makes this cake dense and moist, with the tang of the cream cheese, mixed with the sweetness of the berries and you can't resist another piece! This is another link that Beth sent my way and you can find the original recipe here.

Happy 4th of July!! Have a safe and fun day celebrating our freedom!
Red, White, and Blueberry Cream Cheese Pound Cake

2 sticks unsalted butter, softened, but not quite room temperature
1 8 ounce package of cream cheese, softened slightly
1 1/2 cups sugar
4 eggs
1 1/2 teaspoons pure vanilla extract
2 cups unbleached all-purpose flour
1 1/2 teaspoons baking powder
1 1/2 teaspoons kosher salt
6 ounces raspberries
6 ounces fresh blueberries---I used blackberries
lemon glaze (recipe follows)

1. Preheat oven to 325 degrees. Spray bundt pan with non-stick cooking spray, and place on a cookie sheet.

2. In a mixer fitted with the paddle attachment, cream together butter and cream cheese. Pour in sugar and mix until smooth. Add in eggs, one at a time, mixing well until each is incorporated.

3. While ingredients are mixing, whisk together four, baking powder, and salt in a separate bowl. Slowly add flour mixture to the wet ingredients.

4. Fold berries into batter.

5. Distribute batter evenly into pan and bake until a toothpick inserted in the center comes out clean, about 45-50 minutes. Let cool completely. Drizzle with lemon glaze.

Lemon Glaze
2 cups powdered sugar
juice of 1 lemon
2-3 tablespoons heavy cream

Mix all ingredients together until smooth. Add more juice or cream as necessary to achieve desired consistency.

Tuesday, June 15, 2010

Smore's Sandwich Bar Cookies

I have been away from The Cookie Carnival for some time now and when I got the email from Tami showing the new cookies for this month I knew I would be making these as soon as I could! You see, I have an addiction to gooey, roasted marshmallows. I just can't help myself when it comes to them...not sure where it comes from. Tami decided that for the Summer months we will have a kid friendly recipe along with the normal cookie recipe. As you can see, I went straight for the kid friendly one and let me tell you...I am so glad that I did. I couldn't get Abby or my boys in the kitchen to help me with these, but that's quite alright, they did their share in eating them! Seriously, these are amazingly good! Healthy, not so much...but honestly, it's worth the splurge!

I did have to improvise on a couple of things...I didn't have any Hershey bars, so I used semi sweet chocolate chips and no mini marshmallows, I had the large ones and just lined the top. I'm thinking next go around will have to include homemade marshmallows, you just can't go wrong with them.


S'mores Sandwich Bar Cookies
From: Hershey

Ingredients:
1/2 cup (1 stick) butter or margarine, softened
3/4 cup sugar
1 egg
1 teaspoon vanilla extract
1-1/3 cups all-purpose flour
3/4 cup graham cracker crumbs
1 teaspoon baking powder
1/4 teaspoon salt
1-1/3 cups (8-oz. pkg.) HERSHEY'S Mini Milk Chocolate Bars OR 5 HERSHEY'S Milk Chocolate Bars (1.55 oz. each)
3 cups miniature marshmallows

Directions:
1. Heat oven to 350°F. Grease 8-inch square baking pan. 2. Beat butter and sugar until well blended in large bowl. Add egg and vanilla; beat well. Stir together flour, graham cracker crumbs, baking powder and salt; add to butter mixture, beating until blended. Press half of dough in prepared pan. Bake 15 minutes. 3. Sprinkle mini chocolate bars over baked layer or arrange unwrapped chocolate bars over baked layer, breaking as needed to fit. Sprinkle with marshmallows; scatter bits of remaining dough over marshmallows, forming top layer. Bake 10 to 15 minutes or just until lightly browned. Cool completely in pan on wire rack. Cut into bars. 16 bars.

Tuesday, June 8, 2010

Chocolate Chip Cookie Bars

Last week Abby had her tonsils and adnoids out. It really has been alot tougher than I thought it would be. She has lost over 5 lbs and still isn't eating and the fever came back yesterday. Do you know how hard it is to get a 9 year old to eat nothing but soft things, when the said 9 year old doesn't really like jello, ice cream, pudding? Let me just say that she is growing tired of mashed potatoes.

Last night while we were talking about what she wanted to eat, she said that she was craving a warm, chewy chocolate chip cookie. I then remembered these bars that I had bookmarked from Donna of My Tasty Treasures. I thought maybe the edges of the cookies would be hard on her, and the bars would be a little easier. I still don't know the verdict of that yet, because the craving left her as soon as it came to her.

I did have to modify a couple of things...I didn't have any brown sugar, so I googled the substitute for it and you can mix 1 cup sugar with 2 Tbsp of molasses, I had some left from my gingerbread at Christmas, and you know what?? You can't tell a difference in the taste. My bars came out just a little bit dark from it..but no change in the taste. The recipe calls for 2 cups of chocolate chips, I had a cup of mixed peanut butter and chocolate chips, so I threw them in with some chopped up semi sweet chocolate and a bar of my dark chocolate that Beth sent me. Worked out perfectly! And with not having to wait for you butter to soften, you just melt and mix...go ahead and make some for yourself.

Chocolate Chip Bars
From: My Tasty Treasures

2 ⅛ cups (10 ½ ounces) all purpose flour
½ teaspoon salt
½ teaspoon baking soda
12 tablespoons butter (1 ½ sticks), melted and cooled slightly
1 cup (7 ounces) light brown sugar
½ (3 ½ ounces) cup granulated sugar
1 large egg
1 large egg yolk
2 teaspoons vanilla extract
2 cups chocolate chips

Directions
Preheat the oven to 325 degrees. Adjust the oven rack to lower-middle position. Line a 9X13-inch baking pan with foil, letting the excess hang over the edges of the pan by about 1 inch so you can grab those edges and pull the brownies from the pan after they have baked. Spray the foil-lined pan with nonstick cooking spray.

Mix the flour, salt, and baking soda together in medium bowl; set aside. Whisk the melted butter and sugars in a large bowl until combined. Add the egg, egg yolk, and vanilla and mix well. Using a rubber spatula, fold the dry ingredients into the egg mixture until just combined; do not over mix. Fold in the chocolate chips and turn the batter into the prepared pan, smoothing the top with the spatula.

Bake until the top of the bars is light golden brown, slightly firm to the touch, and edges start pulling away from sides of pan, 24–28 minutes. Cool on a wire rack to room temperature. Remove the bars from the pan by lifting the foil overhang and transfer them to a cutting board. Cut into 2-inch squares and serve.

Tuesday, June 1, 2010

Chewy Peanut Butter Cookies

The kids are out of school and we are just enjoying the weather. I can't believe that it has been over 2 weeks since I have posted last, but sometimes life just happens.

I found these cookies from Amanda's Cookin' and knew that I had to make them. Peanut butter cookies, or if I am being honest, anything with peanut butter is my all time favorite. These were quick to mix together with a short bake of 8 minutes and they were perfect. Soft and chewy, just what I needed!

Soft and Chewy Peanut Butter Cookies
From: Amanda's Cookin'

1/2 cup shortening (or butter flavored shortening)
3/4 cup creamy peanut butter
1 1/4 cups firmly packed light brown sugar
3 tbsp milk
1 tbsp vanilla
1 egg
1 3/4 cups all purpose flour
3/4 tsp salt
3/4 tsp baking soda

Preheat oven to 375 degrees F.

Combine shortening, peanut butter, brown sugar, milk and vanilla in large bowl. Beat with electric mixer at medium speed until well blended. Add egg. Beat just until blended.

Combine flour, salt and baking soda. Add to creamed mixture at low speed. Mix just until blended.

Drop by heaping teaspoonfuls (using a cookie scoop works great) 2 inches apart onto ungreased baking sheet. Flatten slightly in crisscross pattern with tines of fork.

Bake for 7 to 8 minutes, or until set and just beginning to brown. DO NOT OVERBAKE. Cool 2 minutes on baking sheet. Remove cookies to racks to cool completely.

Wednesday, May 12, 2010

Strawberry Turnovers

Spring has arrived here and the weather has been beautiful. We are having a blast just being outside and enjoying it. With that said, there hasn't been alot of activity in the kitchen. I have had this craving for a strawberry fried pied, but seeing how that really isn't the healthiest thing, I opted for this strawberry turnover. These turned out tasty and low sugar, which helps with the blood sugar levels. This recipe could be adapted to any fruit or filling of your liking.


Strawberry Turnovers
From: Cooking Light Desserts

1 lb strawberries, lightly chopped
1 Tbsp vanilla sugar, or regular sugar

4 (14x9 inch) sheets frozen phyllo dough, thawed
Butter-flavored cooking spray

1/4 cup sifted powdered sugar
1/2 tsp water
1/8 tsp vanilla

Preheat oven to 400 degrees.

Combine the strawberries and sugar into a bowl, and mix until combined.
Place 1 phyllo sheet on a damp towel (cover remaining dough to keep from drying out). Lightly coat with cooking spray. Place second phyllo sheet over first sheet, lightly coat with cooking spray. Cut stacked sheets lenghtwise into 3 equal strips (each about 4 1/2 inches wide).
Working with 1 strip at a time (cover remaining strips), place 2 Tbsp strawberry mixture at base of strip. Fold the corner over strawberry mixture to form a triangle. Continue folding triangle back and forth to end of strip. Place triangle, seam side down, on a baking sheet coated with cooking spray. Repeat with remaining 1 phyllo sheets and strawberry mixture. Coat triangles with cooking spray.

Bake at 400 degrees for 12 minutes or until golden. Remove from pan, and cool 5 minutes on a wire rack.

Combine powdered sugar, water, and vanilla, stirring until smooth. Drizzle sugar mixture evenly over turnovers.

Wednesday, May 5, 2010

Our first garden!


This year will be our first year planting a garden. I am enjoying watching the excitement in my kids! I didn't think that they would care at all about it, but to my surprise, they are just as excited as I am! Now, let's just pray that it all grows!!

Friday, April 30, 2010

No Bake PB/Chocolate Bars

You know those famous little no bake cookies?? These kind of taste like those...only deconstructed. I found these over at Buns in my Oven, and no it's not that kind of bun! There are tons of great looking recipes on her site, so go and check her out if you haven't already. The one thing that caught my eye with these is the small amount of sugar that you add to the mix.

No Bake Chocolate Peanut Butter Oatmeal Bars

Ingredients:
3/4 cup butter
1/2 cup packed brown sugar
1 teaspoon vanilla extract
3 cups quick cooking oats
1 cup semi-sweet chocolate chips
1/2 cup peanut butter (smooth or chunky)

1. Melt butter in a large sauce pan over low heat. Stir in brown sugar, vanilla, and oats. Cook for 3 to 4 minutes. Press half of mixture in to the bottom of a buttered 8 x 8 dish.

2. In a microwave safe bowl, microwave the chocolate and peanut butter, stirring every 30 seconds until melted and blended. Pour the chocolate peanut butter mixture over the crust, reserving a couple of spoonfuls to drizzle over the top.

3. Sprinkle the remaining oat mixture over the chocolate and peanut butter, pressing gently to form a crust. Drizzle the remaining chocolate and peanut butter over the top of the bars.

4. Refrigerate for 3 hours before cutting and serving.

Tuesday, April 20, 2010

Banana Bread

To be completely honest, there is nothing special about this banana bread. It is simple, moist, flavorful but nothing that just screams "make me". I did cut the sugar and added in some peanut butter and chocolate chips to the mix and it turned out great. So, here's the thing..if you have some bananas laying around that need to be used, make this bread. You won't be sorry.

Banana Bread
3 ripe bananas
1 1/2 cup all purpose flour
1 1/2 tsp baking powder
1/2 tsp salt
1/2 cup sugar
1/2 cup butter, melted
1 cup PB and chocolate chips, or chopped nuts (optional)

Preheat oven to 350 degrees.

Mash up bananas and mix flour, baking powder, salt and sugar until combined. Mix in the melted butter. Fold in PB and chocolate chips or nuts, if using.

Pour into loaf pan and bake for 45 minutes or until toothpick comes out clean.

Sunday, April 18, 2010

Chocolate Pudding Cake

I am currently addicted to Cooking Light Magazine. There are so many great looking recipes and all that I have tried have come out tasty. I have tried a couple of dinner recipes and they have turned out as well. This is another great one that will be made over again. You really can't go wrong with a slightly crunchy top with moist cake in the middle and as the base a warm pool of chocolate lava. Top it off with some no sugar added vanilla bean ice cream and you are still within the limits of still being a little bit better for you.

I should mention that this recipe was originally Mocha Pudding cake, but since the hubby and kids are very fond of mocha, I left that part out. :)

Chocolate Pudding Cake
From: Cooking Light

1 cup all-purpose flour
1 cup sugar, divided
6 Tbsp unsweetened cocoa, divided
1 1/2 Tbsp instant coffee granules
2 tsp baking powder
1/4 tsp salt
1/2 cup 1% low-fat milk--I used fat free milk
3 Tbsp vegetable oil
1 tsp vanilla extract
Cooking Spray
1 Cup boiling water
Vanilla love fat ice cream

Preheat oven to 350 degrees.

Lightly spoon flour into a dry measuring cup; level with a knife. Combine flour, 2/3 cup sugar, 1/4 cup cocoa, coffee granules, baking powder, and salt in a bowl. Combine milk, oil, and vanilla in a bowl; add to flour mixture, and stir well. Spoon batter into an 8 inch square baking dish coated with cooking spray.

Combine 1/3 cup sugar and 2 Tbsp cocoa. Sprinkle over batter. Pour 1 cup boiling water over batter (do not stir). Bake at 350 degrees for 30 minutes or until the cake springs back when touched lightly in the center (cake will not test clean when a wooden pick is inserted in center). Do not over bake. Serve warm with ice cream.

Note: This recipe is easy to double. Spoon into a 9x13 inch baking dish; bake at the same temperature and time/

Sunday, April 11, 2010

Triple Chocolate Cake


Can something this decadent be delish and still be not bad for you? The answer is YES!! I found some old Cooking Light magazines at a yard sale a couple of weeks ago for 25 cents, so I had to buy everyone they had. This recipe was in one of them. With trying to watch my blood sugar and eat healthier and getting my family eating healthier I knew that this one was one that I would have to try. Everyone in my little clan has a sweet tooth, so trying to find the balance between having the sweets and still being somewhat healthy has been some sort of a challenge. This cake was the perfect thing for the weekend. The texture is a little "spongy" as Blake my 12 year old described it, and the batter is a little thicker than a normal cake batter would be.

Triple Chocolate Cake

By: Cooking Light

1 (18.25 oz) package devil's food cake mix--I used a dark chocolate mix

1 cup fat free sour cream

1/3 cup fat free milk

1/4 cup vegetable oil

1 tsp almond extract

3 large egg whites

1 large egg

1 (3.9 oz) package sugar free/low calorie chocolate pudding mix

Cooking Spray

1 cup sifted powdered sugar

4 tsp fat free milk

1/3 cup semisweet chocolate chips

Preheat oven to 350 degrees.

Combine first 8 ingredients in a large bowl; beat at low speed for 30 seconds. Beat at medium speed 2 minutes. Pour the batter into a 12 cup Bundt pan coated with cooking spray. Bake at 350 degrees for 50 minutes or until a wooden pick inserted in center comes out clean. Cool in pan for 10 minutes; remove from pan and cool completely.

Combine powdered sugar and 4 teaspoons of milk in a small bowl, and drizzle over cake. Let stand 10 minutes. Place chips in a small heavy duty zip top plastic bag; seal. Submerge bag in very hot water until chips melt, or microwave at medium high for 1 minutes. Snip a tiny hole in 1 corner of bag, and drizzle chocolate over cake.

Wednesday, March 31, 2010

Low Sugar Pineapple Pudding Cake

I get daily emails from Taste of Home and this was one that I got earlier this week. I knew right then I would make it. This cake is on the healthy side and all the kiddos, including the hubby, liked it too. The recipe originally called for pineapple..and while that is good too...I could so see this with fresh sliced strawberries or bananas, even peaches. I think whatever fruit you like, it would go well with this dessert.

Pineapple Pudding Cake
From: Taste of Home

1 pkg yellow cake mix
1 1/2 cups cold fat free milk
1 pkg (1 oz) sugar-free instant vanilla pudding mix
1 pkg (8 oz) fat free cream cheese
1 can (20 oz) frozen fat free, sugar free whipped topping, thawed

Prepare cake mix batter according to package directions; pour into a 13x9 inch baking pan coated with cooking spray.

Bake at 350 degrees for 15-20 minutes or until a toothpick inserted near the center comes out clean. Cool completely on wire rack.

In a bowl, whisk milk and pudding mix for 2 minutes. Let stand for 2 minutes or until soft set.

In a small bowl, beat cream cheese until smooth. Beat in pudding mixture until blended. Spread evenly over cake. Sprinkle with pineapple; spread with whipped topping. Refrigerate until serving.

Monday, March 29, 2010

Vanilla Bean Angel Food Cake

With Spring here and the warmer weather showing its presence, what better way to celebrate than with a light and airy angel food cake with fresh berries? With trying to incorporate more healthy desserts in our lifestyle, I found this recipe from Cooking Light and just added in some vanilla bean. I love the extra vanilla that a vanilla bean gives.

I have talked to people that thought angel food cake was a hard thing to do, but it's really not. With just 6 ingredients, and you should have them all in your pantry, you can whip up this cake in no time and would be perfect a perfect dessert for the Easter weekend!

Angel Food Cake
From: Cooking Light

1 cup sifted cake flour, or all purpose
1 1/4 cups sugar, divided
10 egg whites
1 1/4 tsp cream of tartar
1/8 tsp salt
1/8 tsp vanilla extract, or 1/2 vanilla bean, split and scraped

Preheat oven to 350 degrees.

Sift together flour and 1/4 cup sugar; set aside. Beat egg whites with a mixer at high speed until foamy. Add cream of tartar and salt; beat until soft peaks form. Add remaining 1 cup sugar, 2 Tbsp at a time, beating until soft peaks form. Sift 1/4 cup flour mixture over egg white mixture, and fold in. Repeat procedure with remaining flour mixture, 1/4 cup at a time. Fold in vanilla.

Spoon batter into an ungreased 10-inch tube pan, spreading evenly. Break air pockets by cutting through batter with a knife. Bake at 350 degrees for 40 minutes or until cake springs back with lightly touched. Invert pan; cool 40 minutes. Loosen cake from sides of pan using a narrow metal spatula; invert cake onto a serving plate.